


Several major counties in Texas are currently under “shelter-in-place” orders, which means millions of Texans have recently found themselves stuck at home with an abundance of free time. With the exception of “essential” businesses like grocery stores, gas stations, and pharmacies, businesses all over the state have shuttered. The unemployment rate is headed for the double digits, and we are in the middle (or just the beginning) of an unmitigated economic and social disaster. Make no mistake, things are bad. So bad. We are all full of stress and worry, and many of us are struggling to distract ourselves from the intensity of our emotions, and this indefinite period of suffering and social distancing.
That being said, now is as good a time as any to reassess, take stock, and perhaps acquire some new skills. Which means it’s a good time to inaugurate the crafting column we’ve been talking about doing for a while now at Texas Monthly, called Pins and Needles. Our first project: a Whataburger-themed koozie, using yarn I already had lying around in my home, because it wasn’t like I was going to step out to Jo-Ann’s.
Tutorial
I should preface this by saying I barely know I’m doing. I learned crochet a year ago via YouTube videos (such as these) and online patterns (examples here) in order to make my newest niece a baby blanket. Since then I have expanded my skill set to include regular-sized blankets, hats, roses, tulips, and now koozies.
But everything I’ve made is full of mistakes; some I am aware of, and many more I probably haven’t noticed. In fact, the reason I decided to learn to crochet, as opposed to knitting, is because of friend of mine said that crochet was “faster and more forgiving.” So to any actual experienced crafters reading this post who are cringing at my directions, what can I say? The rules of crochet are just another societal construct that’s going to have to fall by the wayside in these near-apocalyptic times.
We wanted our crafts for this series to be Texas-related, beginner level, and of actual use. Since we all just sit in our houses now watching TV and drinking, a koozie seemed like a wise choice. Plus I could make it out of the orange yarn that was just sitting in my closet and call it Whataburger-themed. The koozie is not a super difficult pattern, but it’s not, say, the most basic crochet project. If you want to get a feel for the stitches you’ll need to know how to use here (it’s really just slipknot, chain stitch, and single crochet), then I suggest starting with a single crochet “granny square.” This tutorial should do the trick.
For this project I used what was already in my home, which is Paintbox Yarn’s “Simply Chunky” material in Vanilla Cream and Blood Orange, with a size “I” 5.50mm crochet hook, but you can pretty much use whatever the heck ya want. (And yes, I realize Whataburger colors are orange and white, not orange and tan. But I didn’t have white, and all the craft stores are closed.)
Step 1
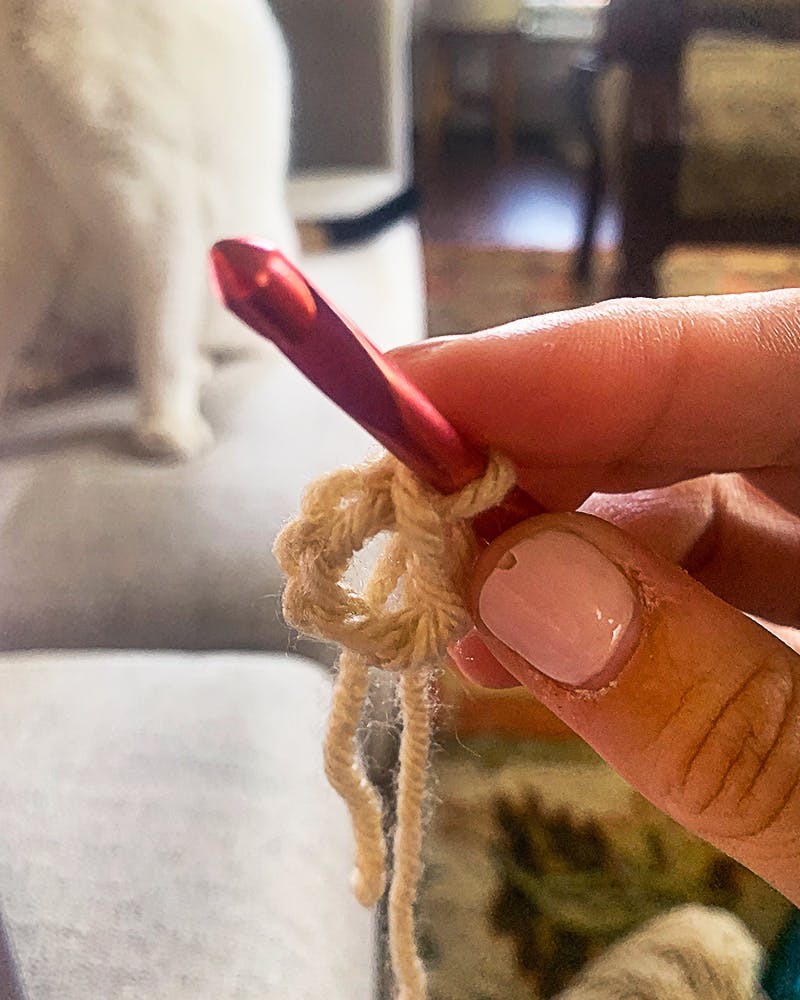
You can start your koozie a couple different ways. I used a magic circle, which is a nifty way to start a round crochet project without leaving a hole in the center. But this can be a little hard for true beginners and something that still takes me a few tries to get right. If you choose to do a magic circle, just make sure there are six single crochets in it. The easiest is to make a chain ring. You’ll start by making a slipknot, then chain six, then slipstitch into your first chain to join your circle. (Watch this video to see exactly how to do a chain circle, though remember your chain should be six stitches long, while hers is only four.)
Then, put two single crochets into each stitch, starting with the one you put your slipstitch in. (Single crochet instructions here.) When you finish your second “round” you’ll have twelve stitches. Then, just keep going.
Step 2
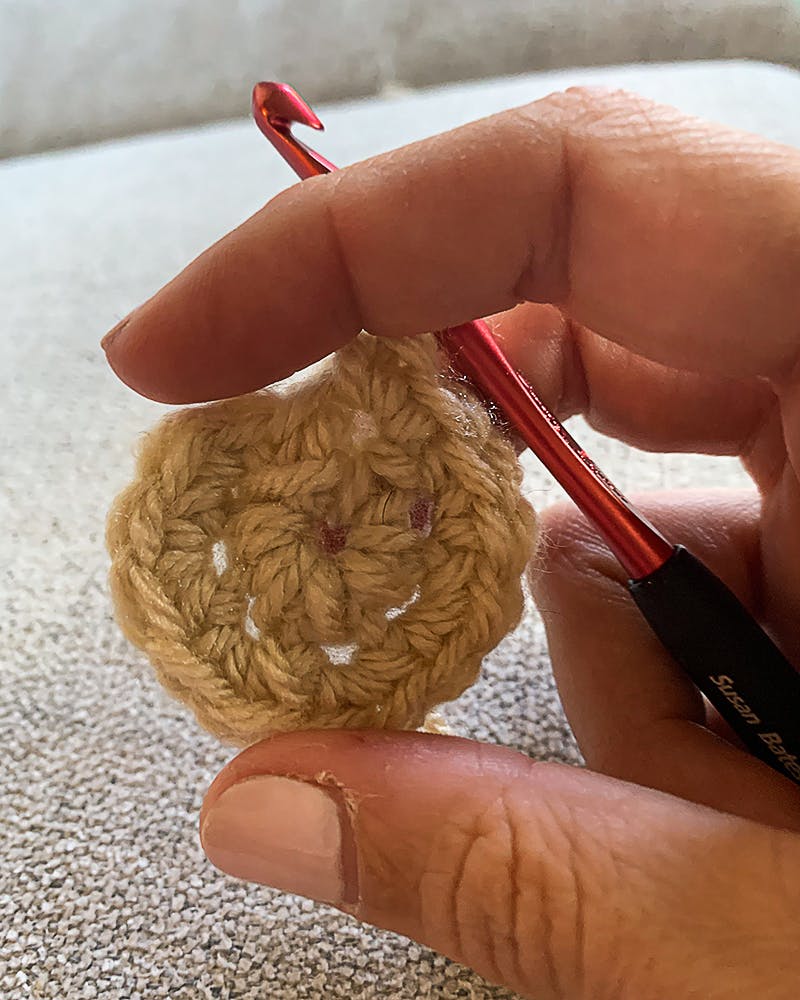
In your next round, you’ll put one single crochet in the first stitch, then two single crochets in the next stitch, alternating around the entire circle this way until you have 18 stitches total. In round four, you do one single crochet in the first stitch, then one single crochet in the second stitch, then two single crochet in the third stitch until you have 24 stitches. Your fifth round will consist of one single crochet in the first three stitches, then two single crochet in the fourth stitch, giving you 36 stitches, I think. Math is hard!
I should say here that when doing these rounds I usually stop paying attention at some point in the circle and don’t always bother to count stitches. Just eyeball it! It doesn’t have to be perfect. Basically, what you’re trying to do is make a circle with a diameter that’s koozie-sized. For mine, that was five rounds.
After that, keep putting single crochets into each stitch until you reach your desired koozie height, which for me was about 4.5 inches (just tall enough to cover a Waterloo Black Cherry seltzer, or a beer, if that’s your scene). It’ll automatically start looking like a koozie shape, which is always fun to see, especially if you don’t feel like you know what you’re doing.
Step 3

If you want to switch colors, like I did with my Whataburger-inspired design, here’s what you do: When you get done with your fifth round of non-escalating single crochets (so, not including the rounds on the bottom of your koozie) cut your yarn and tie it to a new color, then keep going for another five rounds or so.
If you want to mark the first stitch of every round to make sure you’re adding a new color in the right spot, you can just stick a paper clip into the first single crochet of your round (you can also use a formal stitch marker, if you have one; also, I have used yarn and even dental floss to mark a stitch when I can’t find anything else).
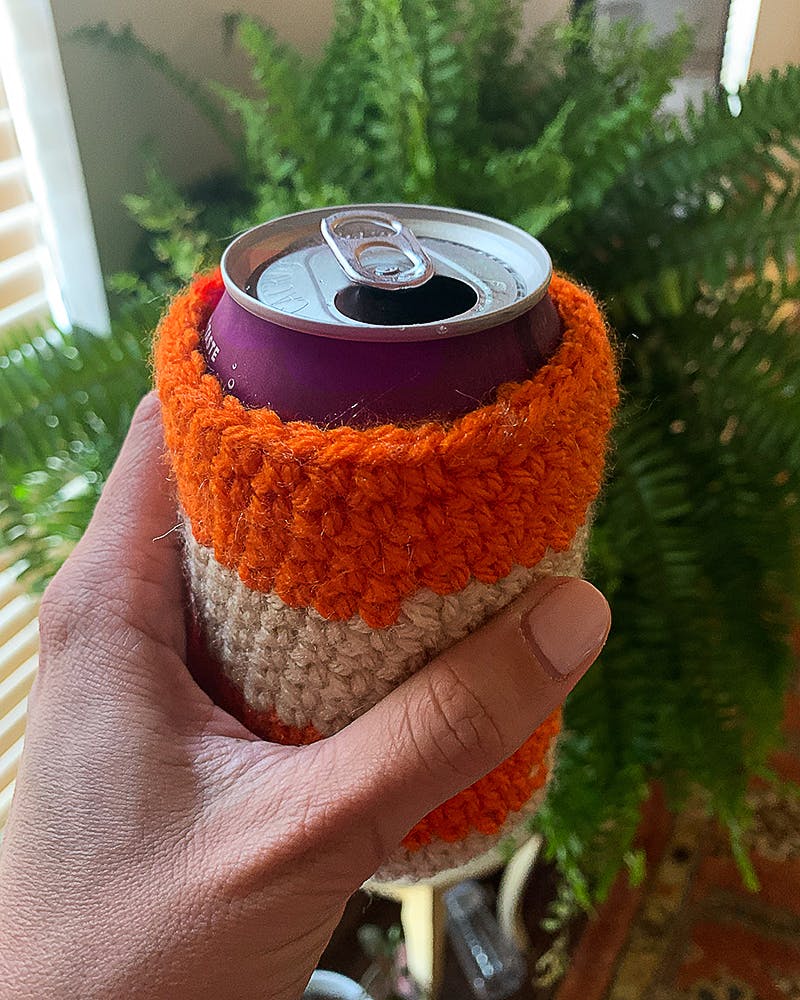
I did not mark my stitches, and as you can see from the photograph, part of my koozie does not look very good. But I don’t really mind, and nobody has to see that side during Zoom happy hour.
Finale

When your koozie is as tall as you want it, simply stop making stitches, cut your yarn, and tie it in a knot around your final stitch. (I don’t know if this is how you’re supposed to “cast off,” but it’s how I do it. Here are some probably more helpful suggestions.) If you’re buying crochet supplies, make sure to get some tapestry needles, which you can then use to thread the tail end of your yarn through some of the previous stitches.
All told, my koozie was about twenty rows high (four stripes of alternating colors), with a base of five rows. It fits my Waterloo Black Cherry-flavored seltzer perfectly. Best of all, it killed a couple hours of this newfound free time I have.
Cheers!
- More About:
- Style & Design
- Crafting


