


Hold on to your butts, readers. The road to this week’s Pins and Needles column has been a winding one, and this post is going to get as close to feeling like an “exciting adventure” as a crafting column could ever be.
See, two weeks ago, right after I finished my structurally unsound sculpture of thirties labor activist Emma Tenayuca, I decided to try my hand at cross-stitching. It’s something I’ve always wanted to learn, because my late mother cross-stitched Christmas stockings for my brother and me when she was pregnant with each of us. But, as I soon discovered, cross-stitching is so, so tedious, and it takes about as long to finish a cross-stitching project as it does to grow an entire human baby. After about a week and a half of devoting three to five hours a day to a nine-by-fifteen-inch picture of the balancing rocks at Big Bend (which I hope to write about in a future Pins and Needles post), I was maybe a tenth of the way through, and needed to find something else I could craft in order to meet my deadline for this bimonthly column.
Fortunately, because I am a craft hoarder, I had this Creativity for Kids Emoji Window Art kit in my back pocket, an impulse purchase I picked up on sale for $6.97 at Michaels a while back. (I do not have children, FYI. I bought this for my thirty-three-year-old self.) It’s a kit for the DIY window clings project (here’s an example) that comes with premixed “paints” (which are basically just colorful glittery glue), outlines for the emojis that you can trace, and plastic sleeves.
All I had to do was come up with some Texas-themed window clings. An easy fix! Finding myself increasingly obsessed with stained glass with every year that I age, I decided to style mine that way. And which Texans are so exemplary they deserve to be rendered in an artistic medium most associated with religious iconography? Beyoncé and Megan Thee Stallion, of course! Recently, Houston’s own Stallion and the Bee released the phenomenal “Savage Remix,” which is arguably the modern equivalent of Shakespeare writing King Lear while quarantined during the bubonic plague. (Let the inimitable Kiana Fitzgerald explain why the song is an instant classic here.)
1.
I did a quick Google image search for stained glass panels that feature horses and bees (I was mostly inspired by a design on this website, where they also have a video tutorial for making resin-cast faux stained glass, which I’ll now add to my ever-lengthening list to crafts I want to do). Then I mocked up this scene, which I thought was a fair-enough embodiment of Meg and Bey’s incredible collaboration.
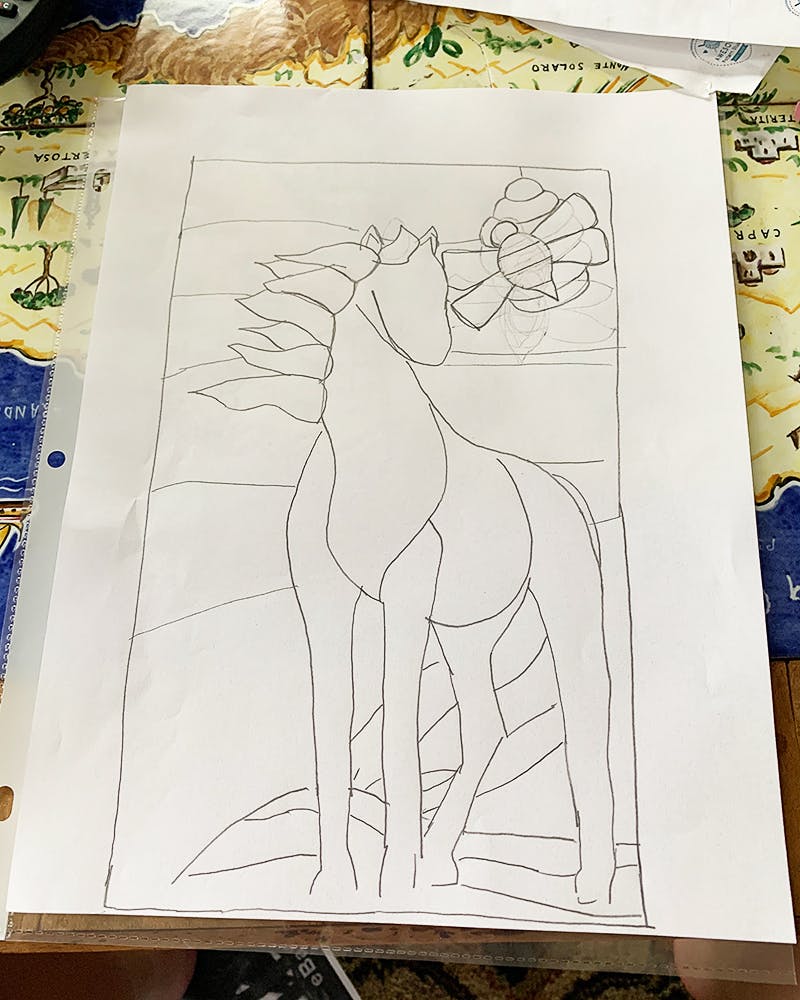 My advice for creating your own scene is to print out an image (that you either created yourself or got the blessing to use; let’s not plagiarize anyone), tape it to a window, then trace the outlines you’ll need on a blank sheet of paper. You’ll notice that the horse I’ve drawn may not technically be a stallion, but let’s go with it.
2.
To make a window cling, you’re basically painting glue onto a piece of plastic and letting it dry. My kit came with plastic protector sleeves for pieces of copy paper. (If you’re full-on DIY-ing it, you can use Ziploc bags.) Once I drew my horse-and-bee stained glass motif, I slid that paper into a plastic sleeve and then traced over it, starting with the black outlines.
Simple enough, right? Or so I thought! Turns out, there are many ways in which one can screw up this simple craft project. I’ve learned some valuable lessons during this process, such as “make small window clings, because one that takes up most of an 8.5-by-11-inch page is going to be very hard to peel off the plastic” and “wait for it dry completely, like the instructions said!” Be aware!

3.
From there, I began filling in each segment with different colors. I was limited by the fact that this kit only had orange, yellow, green, purple, pink, and white, so I decided my stallion would be a an orange and white pinto, with a black and orange mane and tail. The bee I painted a classic yellow and black, with white wings, on top of a white beehive. I then filled in some green grass on the ground, and the sky would just have to be purple, an artistic license I took as an Austinite, what with our Violet Crown and all.
4.
I let the piece dry overnight, for a total of about twenty hours, then started trying to peel it off. The project then started to literally fall apart.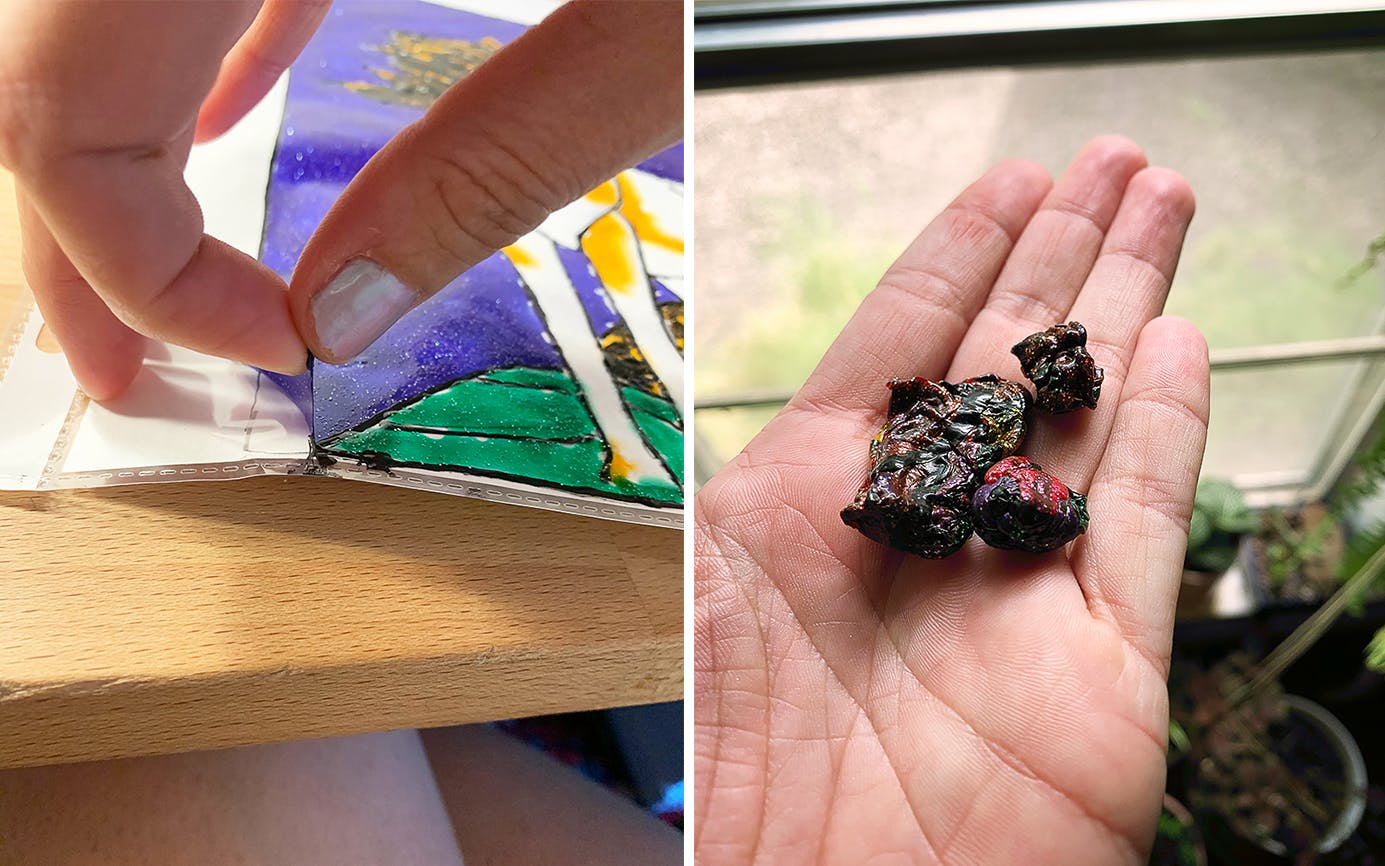 Here’s where I think I went wrong: First of all, I don’t think the glue-paint was as dry as it could have been. Also, if you look closely at some of the photos above, you’ll see that there are obvious gaps between some of the paint and the black outline. When everything dried there were tons of holes, so as I pulled it up off the plastic it started ripping. Patience is a virtue I do not possess, so eventually I got frustrated, pulled the whole thing off, then crumpled it up into these unsightly mounds of glittery glue.
5.
After taking a moment to reflect, I started over. I would just have to make smaller window clings. I reduced the same scene by about 50 percent and drew another one, this time just the bust of majestic horse and a bee in the corner. No beehives this time. I paid more attention to the amount of color paint I was putting in, and made sure there were no gaps between it and the black outlines. (I would continue to check on things over several hours and if gaps emerged during the drying process, you better believe I filled those bad boys in.)
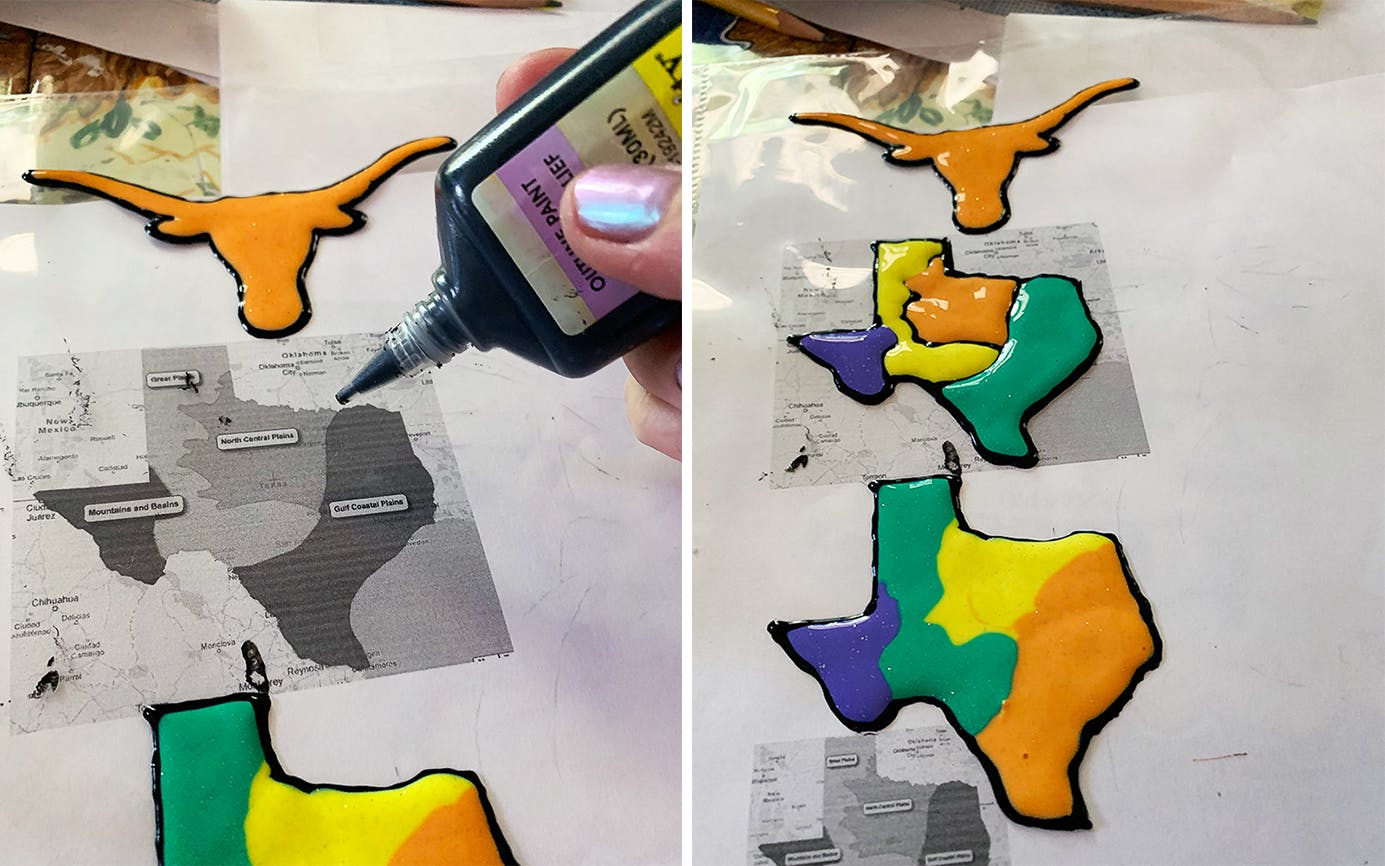
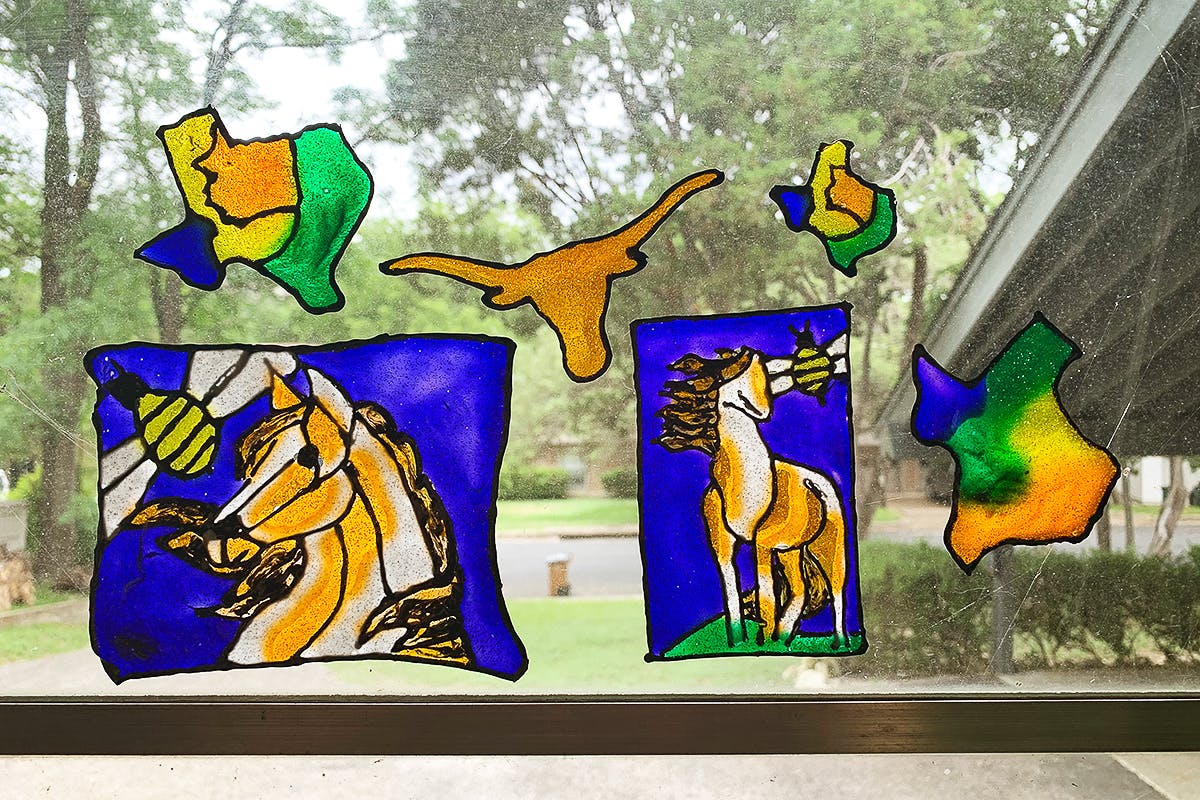
 Since I wasn’t 100 percent confident in my ability to not screw these new window clings up, I decided I would make a few simpler patterns, in the hope that at the end of the day I could teach you how to make something—anything—that would cling to the window in one piece. I made a UT Longhorn logo, and a couple outlines of the state of Texas with its four primary geographical regions (Gulf Coast plains, north central plains, Great Plains, and mountains and basins) onto a single page of a word document. I printed that, slid it into one of my plastic sheet protectors, and started tracing.
6.
After drawing the shapes, I set my new window clings aside and waited 24 hours before trying to peel them off the plastic in one piece.
7.
Happy to say that the second go worked! For the most part. I peeled off the window clings very, very slowly, and all six of them came off intact. The one with the bust of the horse got a little mangled, but it still looks pretty cool.
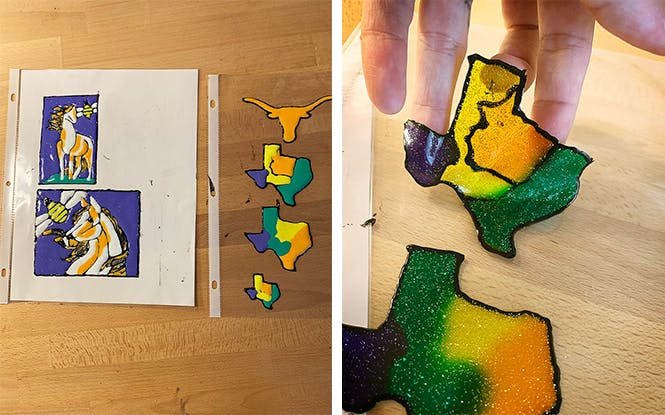 Things to keep in mind: make small window clings. Make sure there aren’t any gaps between your color paint and your outline. If you’re not trying to mimic stained glass, don’t bother using a ton of the outline paint; turns out that was more difficult to peel off. Most importantly, go very, very slowly when you’re peeling your window clings off the plastic. Once you get some of the cling up, don’t use it as a handle to peel off the rest. Just gently nudge the glue-paint away from the plastic where it touches, and try not to let any of your window cling fold over itself, because it will get stuck. This might be easier to do if you give it a full 36 to 48 hours to dry.
8.
The last pieces of advice I’ll give you today are to forgive yourself when you make mistakes—and listen to the “Savage Remix” on repeat.
- More About:
- Style & Design
- Crafting
- Megan Thee Stallion
- Beyoncé


