


Well, we’re all still sheltering in place, and likely will be for a while. We might as well keep crafting. So welcome to the second installment of Pins and Needles!
When we inaugurated our crafting column two weeks ago with a tutorial for crocheting a Whataburger-themed koozie, we promised to highlight crafts that were both Texas-related and useful, done by someone who’s learning how to make crafts in real time (yours truly). This time I’m playing it a little fast and loose with the meaning of “useful,” but these crepe paper wildflowers are definitely Texas-related. Hopefully, they can alleviate the pain of not being able to spend much time with the real deal in the open air, and add some brightness to your living room too.
Believe it or not, I know even less about paper flower making than I do about crochet. Luckily, there are many instruction books available—and a woman named Lia Griffith has been so publicly into it that she’s developed her own line of bourgeois crepe paper that you can buy at Michaels. But her instructions called for different weights of crepe paper, and required an attention to detail I’m not sure I am capable of while distracted by COVID-19 news reports and the myriad anxieties of my daily life. So I just looked at pictures of Texas wildflowers online, bought a bunch of crepe paper from a website called Just Artifacts in colors that matched my favorite blooms, and started winging it.
And at the end of the day, everything turned out mostly okay. Do these flowers look good? Let’s just say they look fun. Do they smell good, like regular wildflowers do? Sure, that is if you like the smell of paper and glue! But the most important thing is that they take time to make. And at the end of the day you’ll have something completed—which can be comfort right now, when we have no idea how long our self-isolation may last.
The flowers I decided to re-create are bluebonnets, ratabida columnifera, wine cups, and pink evening primrose. (In a perfect world I would have also constructed Indian blankets, brown-eyed Susans, and Texas bluebells, but the first four took up most of my workday, and the BBC period mystery Foyle’s War wasn’t going to binge-watch itself.)
To make these four flowers like I did, here is what you’ll need:
- One roll of crepe paper in magenta
- One roll of crepe paper in blue/violet hybrid
- One roll of crepe paper in lemon yellow
- One roll of crepe paper in white
- One roll of crepe paper in lilac
- One roll of crepe paper in baby blue
- Hot glue gun (or really any kind of good, quick-drying glue)
- Orange marker
- Brown paint pen (or any kind of brown paint)
- Air-dry modeling clay
- Scissors
- Floral stem wire
Bluebonnets
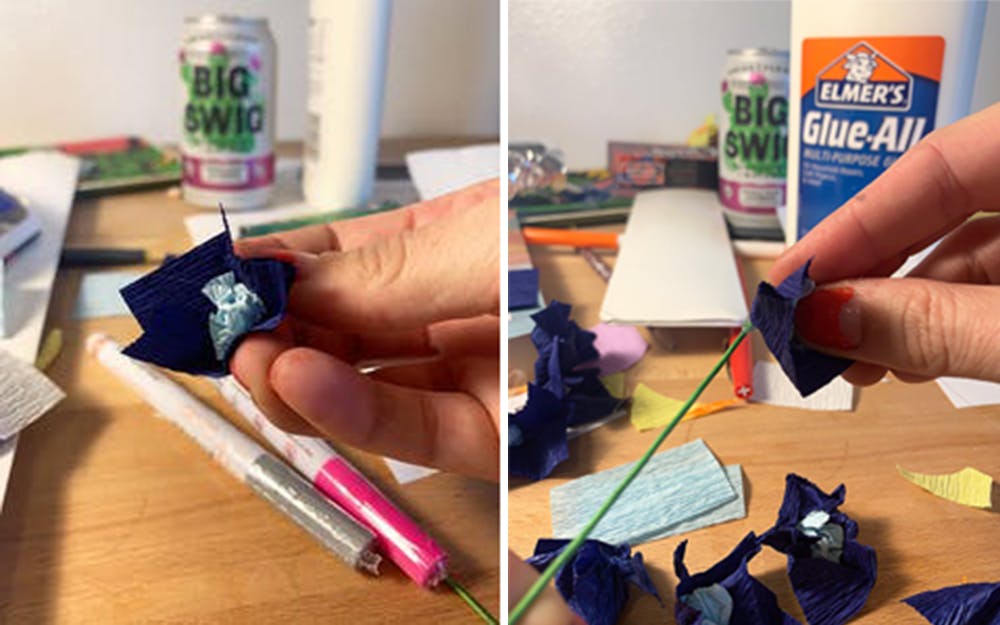
Take your blue/violet hybrid and baby-blue crepe paper and cut into squares that measure roughly one inch on each side. You’ll want about fifteen of each. They don’t all have to be exactly the same size. They can look messy because, if it’s not evident by now, everything about this project—much like life—will look messy.
Roll the baby-blue crepe paper squares into little balls, and glue each ball to the center of each blue/violet square. Then you’ll manipulate the blue/violet crepe paper around the baby-blue ball and set aside. Make fifteen of these little guys, give or take, and start gluing to the top third of one of your floral stem wires. Make sure the baby blue is visible so that from a distance you will be able to clearly see two shades of blue on your flower. Then glue one on the very top of your stem wire. The last thing to do is cut six or seven half-inch squares of white crepe paper, and just scruff them up and tuck them into little pockets on your bluebonnet. (A pop of white looks nice in there.) If you’re using a hot glue gun, your hardest task will be getting all the cooled glue strings off your completed bluebonnet. I pulled as many of them off with my hands as I could, and then when I realized how futile that was, I said the Serenity Prayer and moved on.
Pink Evening Primrose

This flower holds a special place in my heart, because growing up we used them for springtime pranks: They involved telling our victims that these were the best smelling flowers ever, and then laughing our buns off when people tried to smell them and inevitably got bright yellow pollen all over their noses. I didn’t say this was a good prank, but it was the height of comedy for several Hill Country seven-year-olds in the mid-nineties.
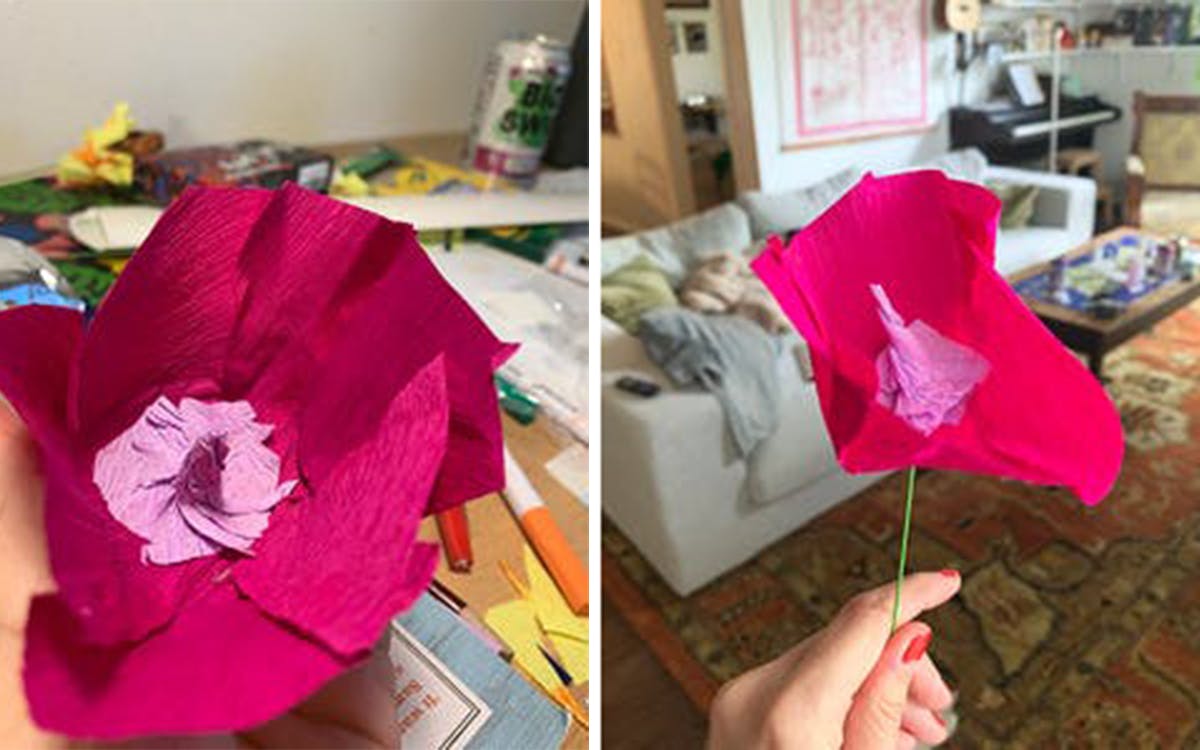
To make a pink evening primrose, you must first cut a circle of lilac crepe paper that’s four or five inches in diameter, roughly. (Again, much like the current “known” cases of COVID-19 in the state of Texas, these numbers aren’t exact.) You’re going to want to mold it into a cup of sorts. I did this by stretching the crepe paper in the center of the circle, which kind of flattened the bottom, and then by gluing some of the sides together so they stayed more upright. Does that make any sense at all? Here, look at a picture!
You can use regular old Elmer’s glue for this if you don’t want to deal with the hot glue gun. The hot glue gun is mostly good for getting things attached quickly to the stem wire when the time comes.

Next, you’ll cut a circle of white crepe paper that is the same diameter as the bottom of your primrose. Glue that in there. Next you’ll cut tall triangles of lemon yellow crepe paper to make the iconic prank-inducing, pollen-covered pistils. Roll the thinnest corner of the triangle into a string, but leave the bottom wider, because that is what you’ll glue to the white crepe paper in the center of your primrose. Make three of four of them, and glue them with some white showing. Manipulate the pistils with your fingers so they look a little creepy.
To affix my primrose cup to a stem wire, I bent the top of the wire about ¼ inch. Let me reiterate that I made this up as I went along. I glued that to a small round of lilac paper, then glued both of those to the bottom of the primrose cup. I did this a few days ago and it hasn’t fallen apart yet, so as far as I’m concerned that’s a masterpiece.
Wine cup
Good news! The wine cup is more or less the same shape as the pink evening primrose, so this shouldn’t be any more confusing than my last attempt at instructions.First, cut a four- or five-inch circle of magenta crepe paper and shape it into a cup. The center of the wine cup looks a little different than the primrose, but all I did was take a chunk of lilac crepe paper and turn it into a 3-D cone-ish shape, then affix it to the inside bottom of my wine cup.Adhere the stem wire to the outside bottom of the cup in the same way we did for the primrose. There you go! Another thing that mostly looks like a flower, a little bit.
Ratibida columnifera
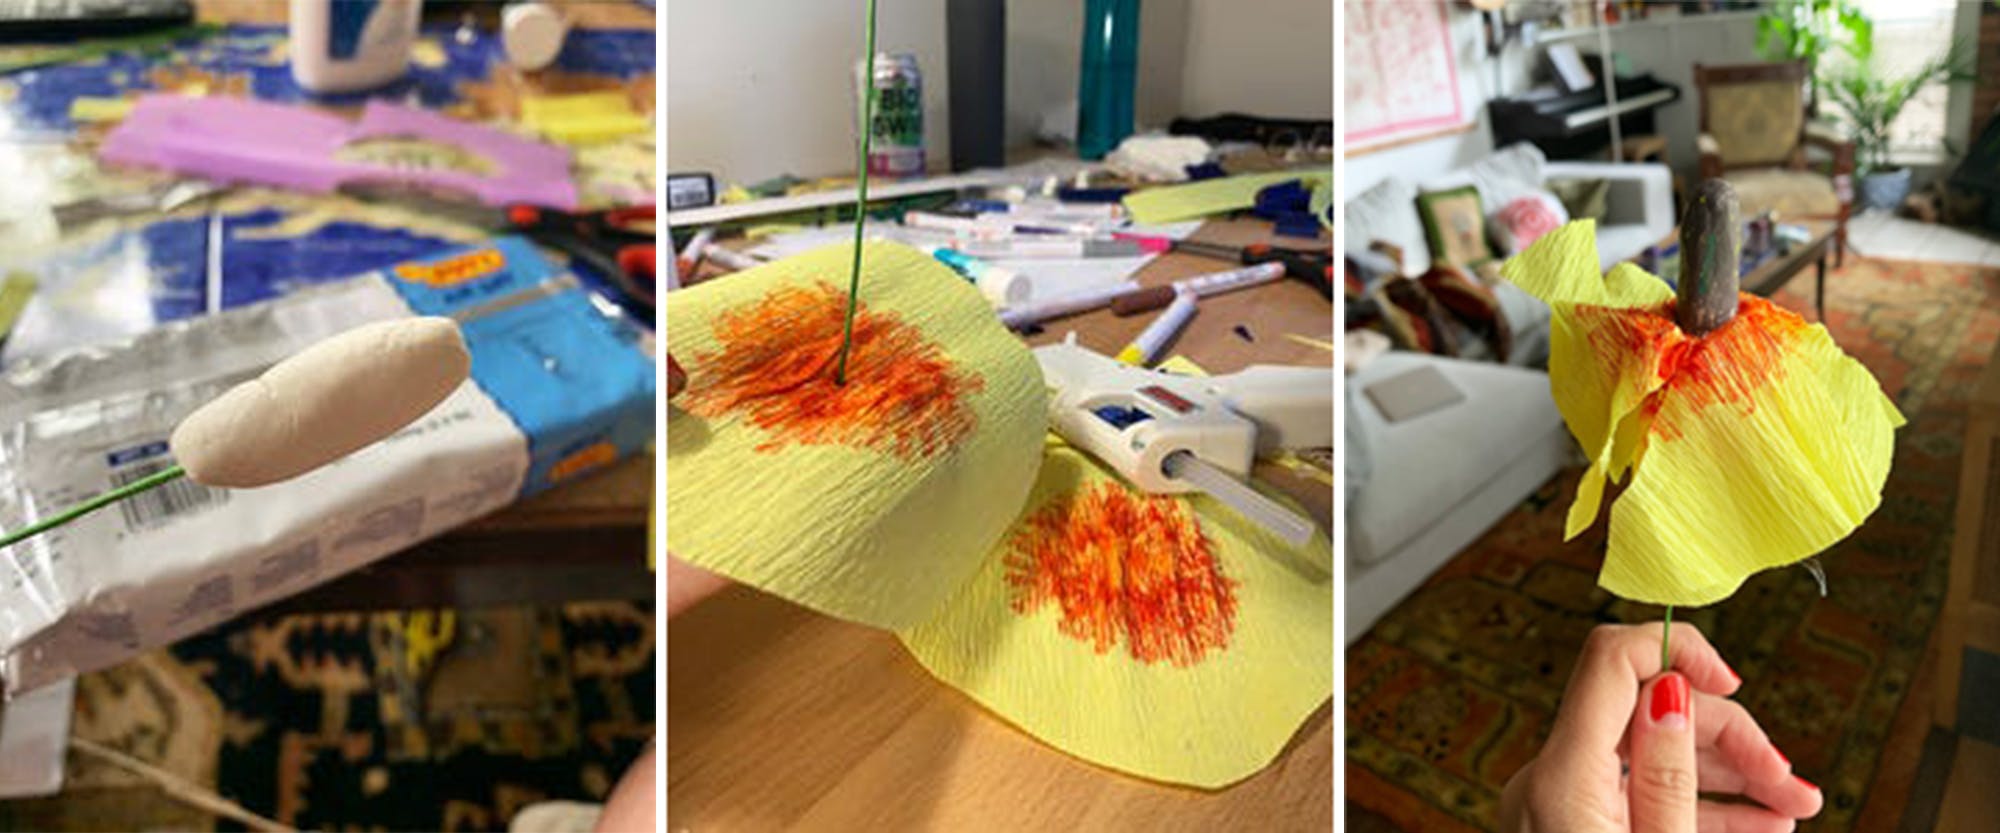
So, this one is admittedly a bit of a disaster. I had decided that instead of getting brown crepe paper for the column in the center of these flowers, I would use air-dry modeling clay that I would paint brown. Up close, the finished product looks like a piece of poop with a flowy skirt on. But from far away it looks almost like a flower, I guess? You be the judge.
(Honestly, if I could do it over, I would just get this crepe paper and form it into a mostly cylindrical shape and then follow the last couple steps. But I’ll go ahead and explain how I made this excremental version.)
The first thing to do here is to form a two-inch cylinder with modeling clay, then stick a floral stem wire in the bottom of it and let it all dry for at least 24 hours. (I should have realized here that the project was going off the rails.) Then, color it brown with a paint pen, or just regular paint. Even a Crayola marker would probably work. Remember: these are crafts, not art. Once that’s done, cut two circles of yellow crepe paper that are about four inches in diameter.Take the orange marker, paint pen, or paint, and color the center of each yellow circle orange. Then you’ll stick the stem wire through each piece of crepe paper, one on top of the other, and glue them to the bottom of your brown cylinder thing. Make sure there’s still orange visible.Push the yellow crepe paper away from where it’s glued to your gross-looking brown column, so the “petals” slope downward. Lastly, take some scissors and chop up the yellow crepe paper circles so they appear more petal-y. It may not look great, but it could look worse!Make as many of these as you want until you have something resembling a bouquet of paper wildflowers. It is my belief that the most important skill a crafter can have is the ability to laugh at oneself, so have fun!
- More About:
- Style & Design
- Art
- Crafting


