


If you’ve never heard of the reverse sear, then the best steak of your life is still in your future. Ever since I first used the reverse sear method, I haven’t cooked a steak any other way. It’s that good. And simple.
What is a reverse sear? The name sounds a little odd, but it’s derived from the other way of cooking a steak, which is to sear it first, then finish it over lower heat until it reaches the desired temperature. Reverse searing, however, begins with low-heat cooking first, then searing over high heat as the final step.
Reverse searing isn’t exactly new, but its popularity among backyard barbecue cooks is growing quickly. Some grilled meat connoisseurs won’t even bother reading this guide because the method seems so obvious, but I taught a demo a couple months back at the Egg Fest (put on by the Big Green Egg folks) in Driftwood, and I was stunned at the number of grilling enthusiasts in attendance who weren’t familiar with the game-changing technique. Here are the basics.
The Meat:
Reverse sear works with any thick steak or chop, but we’ll focus on beef here. When cooking at home, I generally buy thick ribeye, strip, or porterhouse steaks for this method. It’ll work well with less expensive cuts like sirloin and tri-tip too, but only thick steaks. Anything less than an inch should just be cooked directly over the heat until it’s done. Thicker steaks (I prefer an 1-1/2″ to 2″ thick) benefit most from reverse sear because it’s the best way to get a consistent doneness throughout. Normal searing first creates concentric layers of doneness, starting with well done on the outside, rare on the inside, and everything else in between. With reverse sear, the steaks are medium rare from edge to edge.
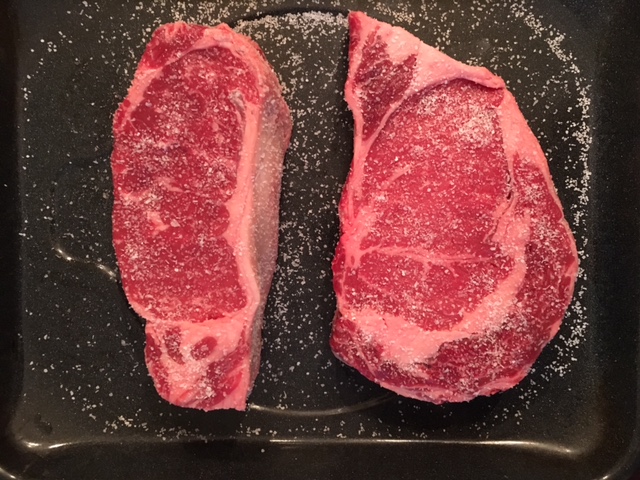
Seasoning:
After eating dozens of steaks cooked using a reverse sear over charcoal, I’ve learned that nothing more than salt is required for a great steak (when using an oven and the stove top, they’re a little boring without some black pepper). If you must have black pepper, or you have a favorite rub, then go for it, but I’m telling you that even the barest spice cabinet is fine. I prefer the bigger crystals of Kosher salt, or the even bigger crystals of the Brazilian sal grosso, if you can find it. The most important part is to season it liberally. Sprinkle salt on every surface until it looks like a good dusting of snow. If you think you’ve got enough salt on there, add some more, and don’t be afraid to add salt early. I generally do it an hour before I plan to cook and leave the salted steaks at room temperature until it’s time to cook. Planning ahead and salting the night before will make the meat even more flavorful (and no, it doesn’t dry out the meat).
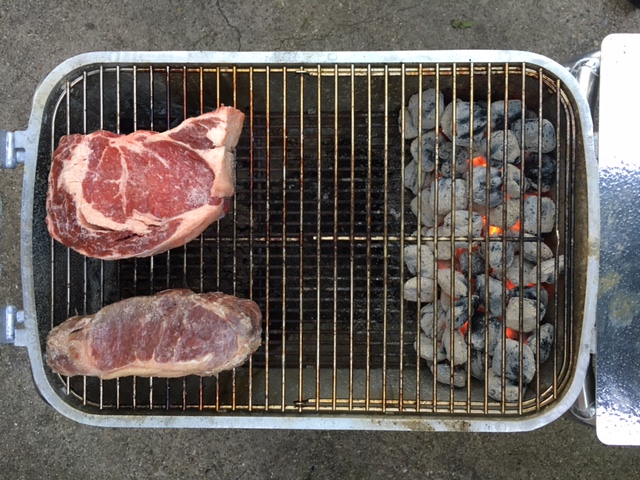
The Slow Cook:
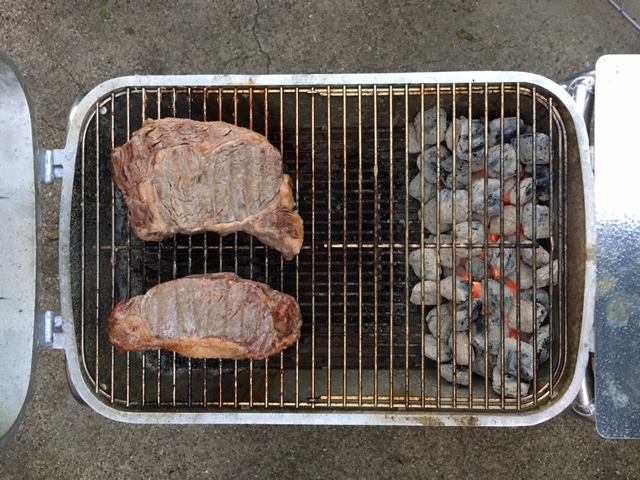
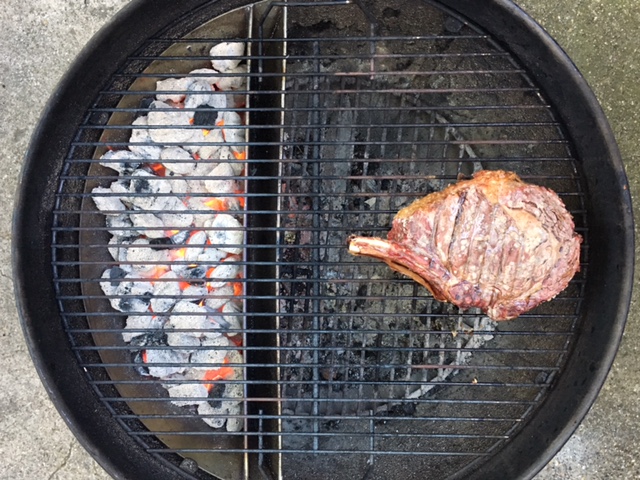
Advertisers love to tell you that searing “locks in the juices,” as much as they repeat the importance of falling-off-the-bone ribs—both laughable messages. Your steaks won’t be any less juicy if you wait until the end to sear. For this portion of the cook, you just want to slowly raise the internal temperature of the meat. I shoot for 115 degrees internal, but you can get there however you choose. An oven set at 275 works well (or even a sous vide bag), but by all means throw it on the smoker if you’d like to produce the most flavorful version. I generally use a charcoal grill with all the coals banked to one side, the vent open above the flame, and the steak placed on the opposite side away from the charcoal. A 2″ thick steak needs only about 20 minutes for this portion of the cook. The steak will look gray and unappetizing, but do not fret. It gets prettier.
The Reset:
Steaks need to rest, but the beauty of this method is that the rest can happen before the final sear. That means you can let the steak sit around for a half hour if everything else for dinner isn’t quite ready. Then sear it off when the time is right.
The Sear:
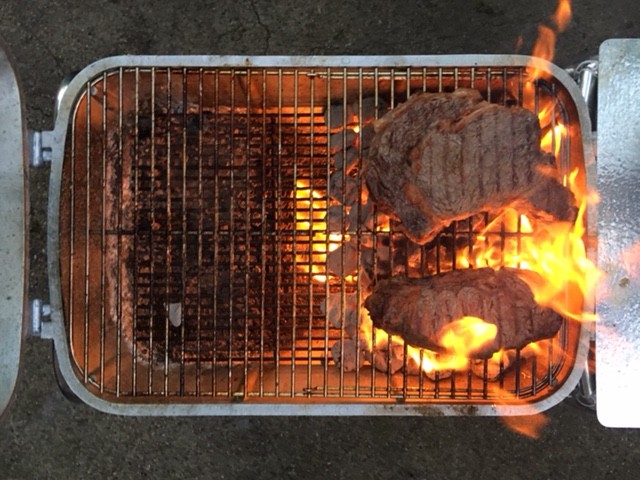
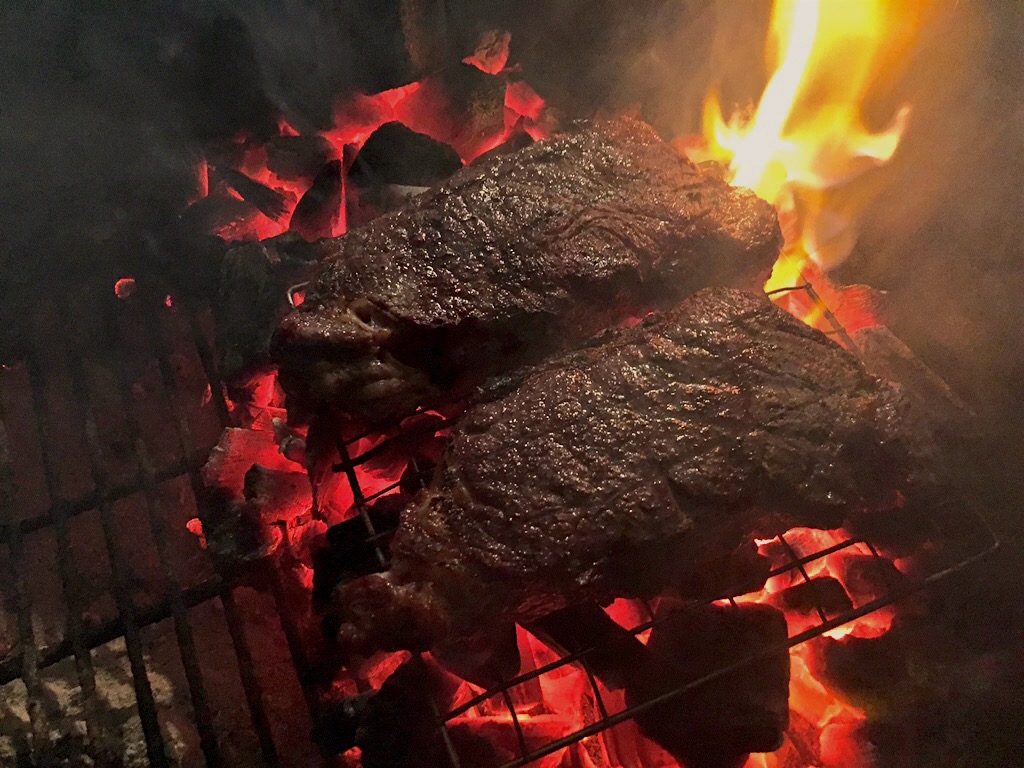
Make it hot. The hotter the better. Once the steak has rested and the grill is screaming hot, put the steak directly over the charcoal. Lump charcoal will give you a higher initial heat, but it doesn’t maintain it heat as well as briquettes. No matter which one you choose, remember that they’re both a time-saving short cut. For the ultimate reverse sear steak, use real wood that you’ve burnt down to hot coals.
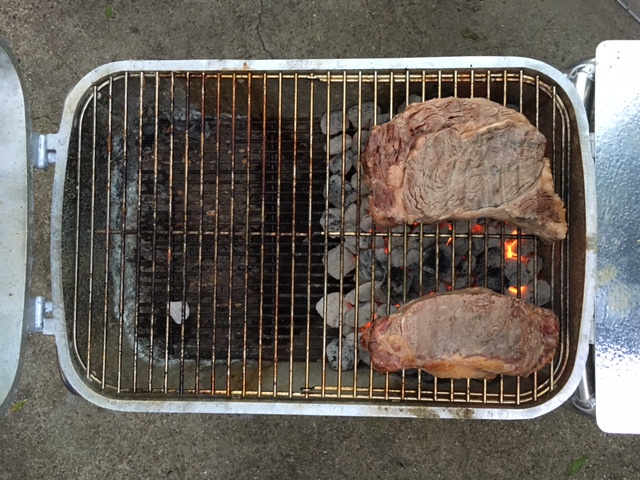
As for the timing, it’s really about the look. With high enough heat, you’ll really need just about a minute or two for each side. The surface will be bubbling with hot fat, and the color will darken quickly. Don’t let it burn, and keep a watchful eye on cuts like ribeye that drip a lot more fat into the fire. It’ll be medium rare before you know it, so keep checking the temp and pull it off at 130-135. The steak will continue to cook a bit on the cutting board.
The Equipment:
I generally use a grill, but an offset smoker is the best tool for reverse sear. Slow smoking the steak, then finishing it on a small grate placed directly over the coals in the firebox is a rewarding cooking experience and a great show. My Weber kettle works just fine too. I’ve started using a Slow ‘N Sear insert in my Weber that helps keeps the charcoal corralled to one side and also keeps the coals close to the grate for super-heated searing. That requires enough charcoal to fill a large chimney, so I’ve found my PK Grill to be more economical with the charcoal. I can reverse sear four strip steaks on it with a large charcoal chimney just two-thirds of the way full.
The Big Green Egg, which I used for the demo, works well too. The temperature is easy to control with the deflector plate installed for the slow portion of the cook (shoot for 275 degrees). Remove the deflector plate after the initial cook, and you can let the grill heat up to 650 degrees for the sear while the steak is resting. Steaks will sear just fine on the grate, but I prefer finding a smaller grate, like a cheap grill basket, that can go right onto the coals. Maybe you’re considering finishing it caveman style by putting the steak right onto the charcoal, but I’d suggest against it. The meat cools the charcoal when it come in contact with it, and cuts off oxygen from reaching the coals. A grate provides just a smidgen of separation between the meat and the coals that will keep that from happening.
Now you’re ready to cook the best steak of your life. The best part is that you’ll never feel like you have pay steakhouse prices again after unlocking this not-so-secret method of cooking the prefect steak. Time to light the charcoal.
- More About:
- BBQ Recipes
- Steak


