


Consider the work of your hands. Specifically, the work of your hands in the kitchen. As they stir, as they truss, as they pound, as they mix, your hands—those able executors of ideas and desires—create wonders of culinary chemistry that will feed and delight those you’ve invited to your table. This is especially true if you live in Texas, where our collective love for a specific repertoire of dishes—grilled steak, fried chicken, chili, biscuits, to name a few—sends us, over and over, in search of the flavors and smells we hold dear. You can find these dishes in many a restaurant, of course, but there’s something about making them yourself—gathering ingredients, lighting the grill—that reasserts your identity. To step into the kitchen and conjure your heritage with your hands—this is Texan.
With that idea in mind, we identified five techniques that are integral to our state’s cooking (grilling, smoking, frying, putting up, and baking) and reached out to some of the finest cooks in Texas for their knowledge on how best to apply them. The result is a collection of recipes and tips that will inspire you to roll up your sleeves and get greasy or smoky or floury. Revel in the act of creation, include your friends and family, and don’t forget to lick your fingers.
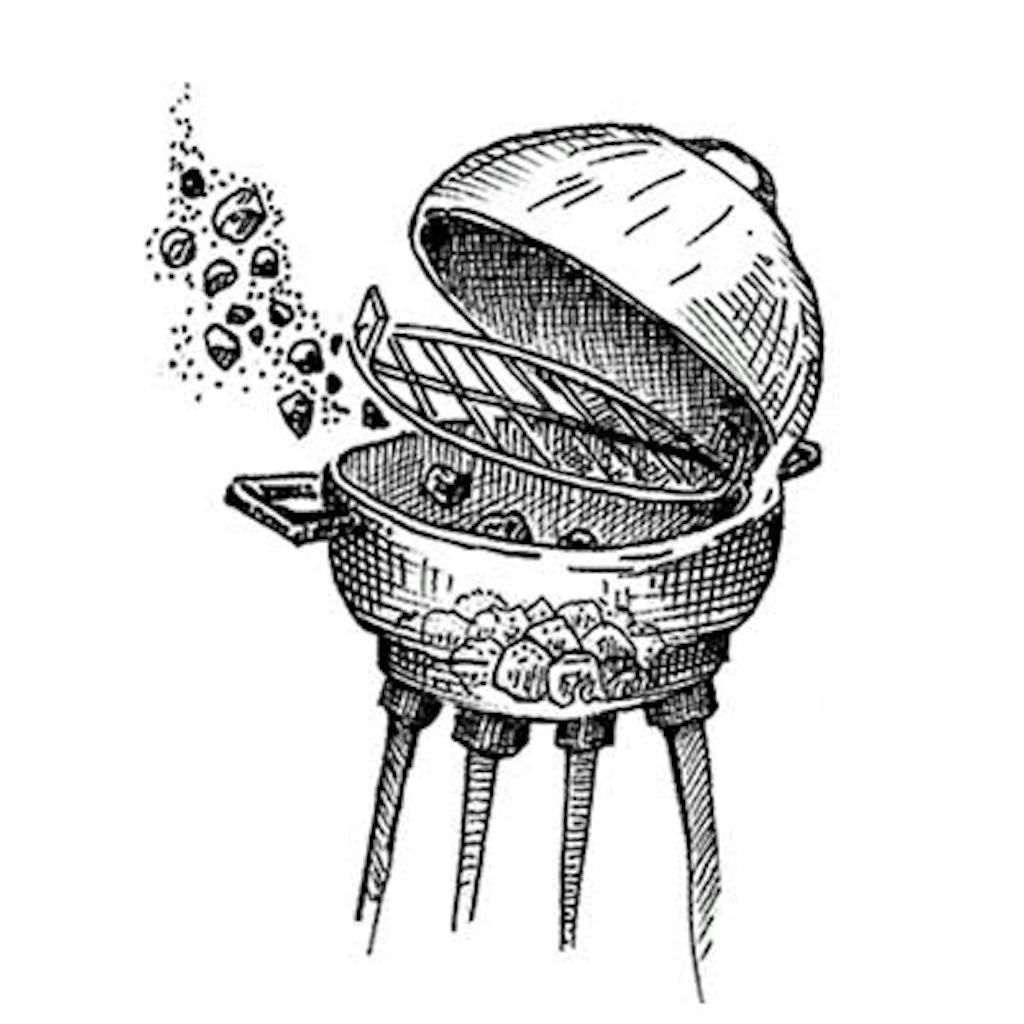
GRILLING
Grilling (don’t dare call it barbecuing) is in our DNA. We’ll throw anything edible on everything from a makeshift grate over a rock-ringed pit to a fancy kamado on the pool deck. An ancient technique born of necessity and nowadays elevated to art form, live-fire cooking is a Texan’s preferred conduit to both nature and neighbor: the novelty of preparing one’s food out of doors is matched in equal measure by the joy of doing so with people we care about, as the aromas of a smoky redfish or a peppery ribeye waft about the celebratory air of a weekend afternoon—an olfactory come-an’-get-it that promises hospitality, camaraderie, and some mighty fine eating.
Allison Jenkins’s Grilled Ribeye
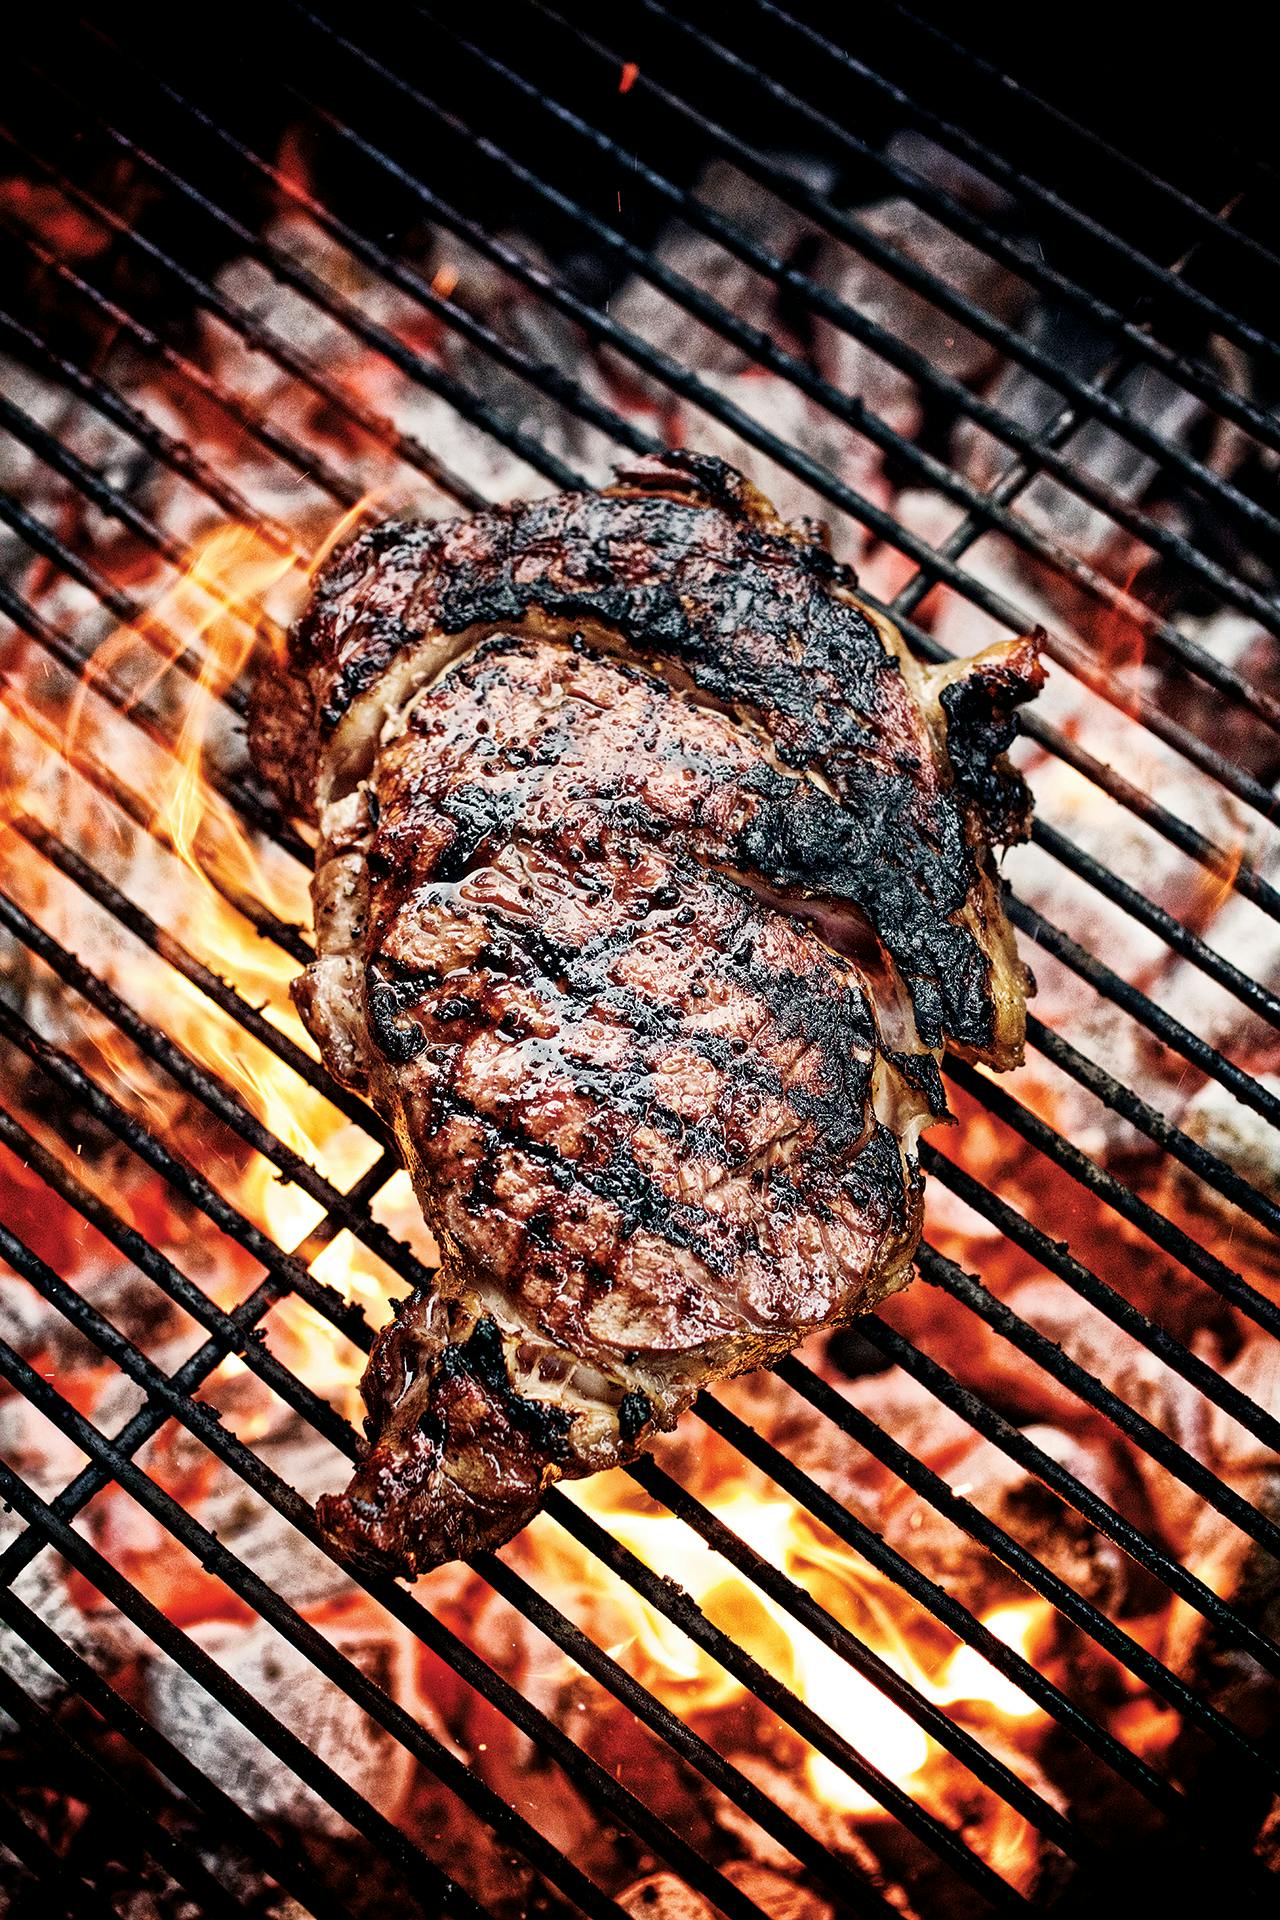
There’s a lot that rides on cooking a great steak: your joy, your reputation, your Texas bona fides. Allison Jenkins knows this. “It’s why people often go out to eat instead,” says the executive chef of LaVenture, at Marfa’s Hotel Saint George. In fact, at her restaurant, steak is one of the most requested menu items, sought after by the area’s ranchers and art scenesters alike. (“I ran out one week and had to put short ribs on the menu,” she recalls. “People got really upset.”) Creating that perfectly crusted, perfectly velvety slice of beef, says Jenkins, is simple enough if you pay attention to the details. It all starts with the cut: ribeye, for its marbling and juiciness. Consult your butcher and choose the best piece you can afford; it should be at least an inch thick. Then it’s about temperature. Start the fire about 30 to 45 minutes ahead so you have decent coals. Finally, says Jenkins, always allow your steak to rest after cooking. This crucial step is one that all restaurant chefs know to do and will set you apart from the novices.
1 16-ounce ribeye
kosher salt and freshly ground pepper, to taste
1 teaspoon canola oil, optional
Arrange coals so that one area of the grill is at medium-high heat and another at medium. Be sure your grill grate is well seasoned, or well scraped, to prevent the meat from sticking  (or, if you wish, brush a little oil on the grill or meat). Season the steak with salt and pepper on both sides, then allow to sit about 30 minutes, until it reaches room temperature. Sear each side for roughly 1 minute over medium-high, then move the steak to medium and finish cooking, to an internal temperature of 130 degrees for medium-rare (about 6 minutes per side). If the meat sticks, let it cook a bit longer and it should release. Remove the steak and allow it to rest 5 to 10 minutes. (To avoid ruining its crust, put it on a cooking rack over a plate.) “If you want to serve it sizzling,” says Jenkins, “you can always throw it on the grill one last time.” Serves 1.
 FOR THE TEXAVORE If you’re particular about the provenance of your provender, these two online options won’t disappoint: Broken Arrow Ranch, which offers everything from pasture-raised Dorper lamb to axis venison, and 44 Farms, which sells grass-fed Black Angus ribeyes, New York strips, franks, and ground beef.

![feature-htclat-texanist-grill-marks]() Ask The Texanist
Ask The Texanist
Q: How important to the finished product are good grill marks? –Sarah Vicks, Amarillo
A: Grill marks can serve the purpose of conveying to the eater of the grilled goods that the goods were grilled upon a grill that was good and hot, which is, of course, one of the key ingredients in good grilling. But deep, dark marks, or a lack thereof, rarely tell the whole story and can in fact be as superficial as a Magic Marker mustache. Personally, the Texanist has never been one to obsess over his or anybody’s grill marks, choosing to focus less on aesthetics and more on the overall toothsomeness of the items on his plate. In this endeavor, he’s cooked beefsteaks over a campfire on a pecan-stick skewer and has even gone “caveman,” dropping his meat directly onto a bed of white-hot coals. Delicious both, though neither bore the brand of a grill. The Texanist cares more about the char of a hot fire than the symmetry of the charring.
Hugo Ortega’s Wood-Roasted Oysters
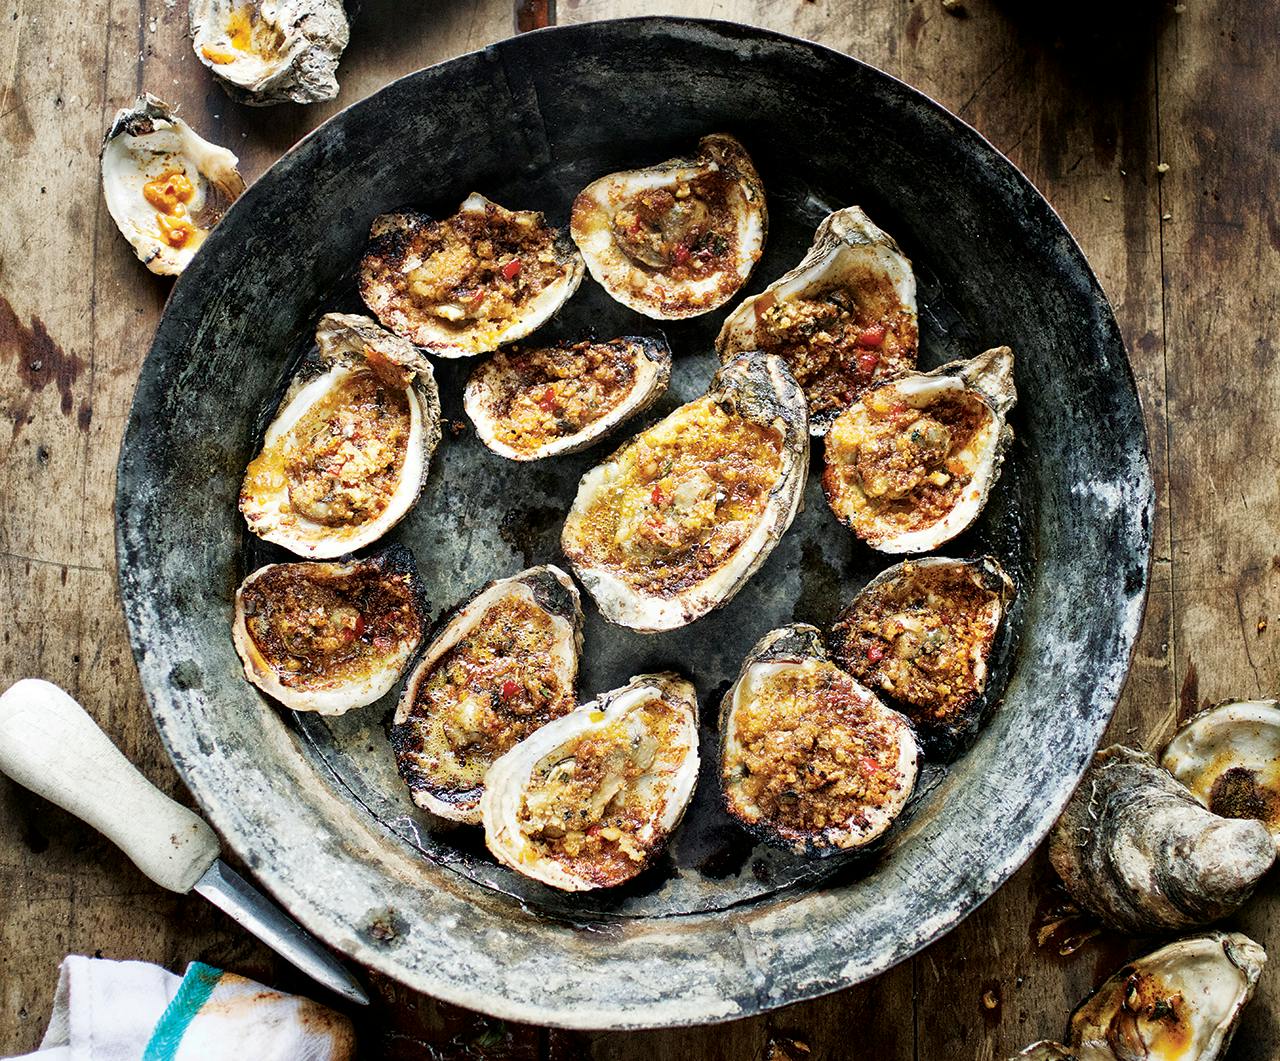
Texans take special pride in their fat and juicy Gulf Coast oysters: we love ’em raw, we love ’em fried. But, honestly, there is no better way to eat them than the way Hugo Ortega prepares them. The Houston chef and James Beard award nominee  regularly attracts fans to his seafood restaurant, Caracol, for the plump bivalves he speed-roasts in a wood-burning oven. Inspired by a long-ago beach cookout in Acapulco, Ortega cooks the oysters on their shells over a live fire, adding a rich chipotle butter and toasty bread crumbs. (For additional flavor boosts, he sometimes consults with the guys in his kitchen, who bring ideas from Mexico City, Monterrey, and Puebla. “The best cooks in Mexico aren’t afraid to try anything with sauces and seasonings,” he says.) To serve his oysters, Ortega arranges them on a big metal serving dish atop rock salt scattered with black and pink peppercorns and sprigs of rosemary, thyme, and oregano. Whether you cook on a Weber grill or in a Big Green Egg or even in the kitchen oven, you’ll find these oysters are easy to master—and good for impressing friends.
1 tablespoon minced fennel bulb
1 tablespoon minced shallot
1 tablespoon minced roasted red bell pepper
1 tablespoon minced fresh thyme
1 tablespoon minced fresh oregano
1 tablespoon toasted and ground guajillo chiles
1 tablespoon toasted and ground chipotle chiles (not canned)
1 tablespoon coarse sea salt
1 pound unsalted butter, room temperature
1 dozen shucked oysters on
half shells with their liquor
3/4 cup coarse seasoned bread crumbs
Preheat grill to high heat. (If using a gas grill, set to medium-high indirect heat. For a broiler, set to high.) In a large bowl, mix first 9 ingredients with a whisk to create chipotle butter, mashing until thoroughly incorporated. Generously spoon butter mixture over each oyster and sprinkle with bread crumbs. Grill until butter is bubbling and the bread crumbs are golden brown, 3 to 5 minutes. (You can cook the oysters either directly on the grate of your grill or on a bed of rock salt in a shallow metal or heavy pottery dish.) Consume immediately. Serves 3 to 4.
FOR THE TEXAVORE
FOR THE TEXAVORE Ortega’s oysters are harvested by Prestige Oyster, in San Leon, which sells them fresh year-round. Rico Torres and Diego Galicia get their quail from Diamond H Ranch, in Bandera, which raises the birds on an all-natural diet.
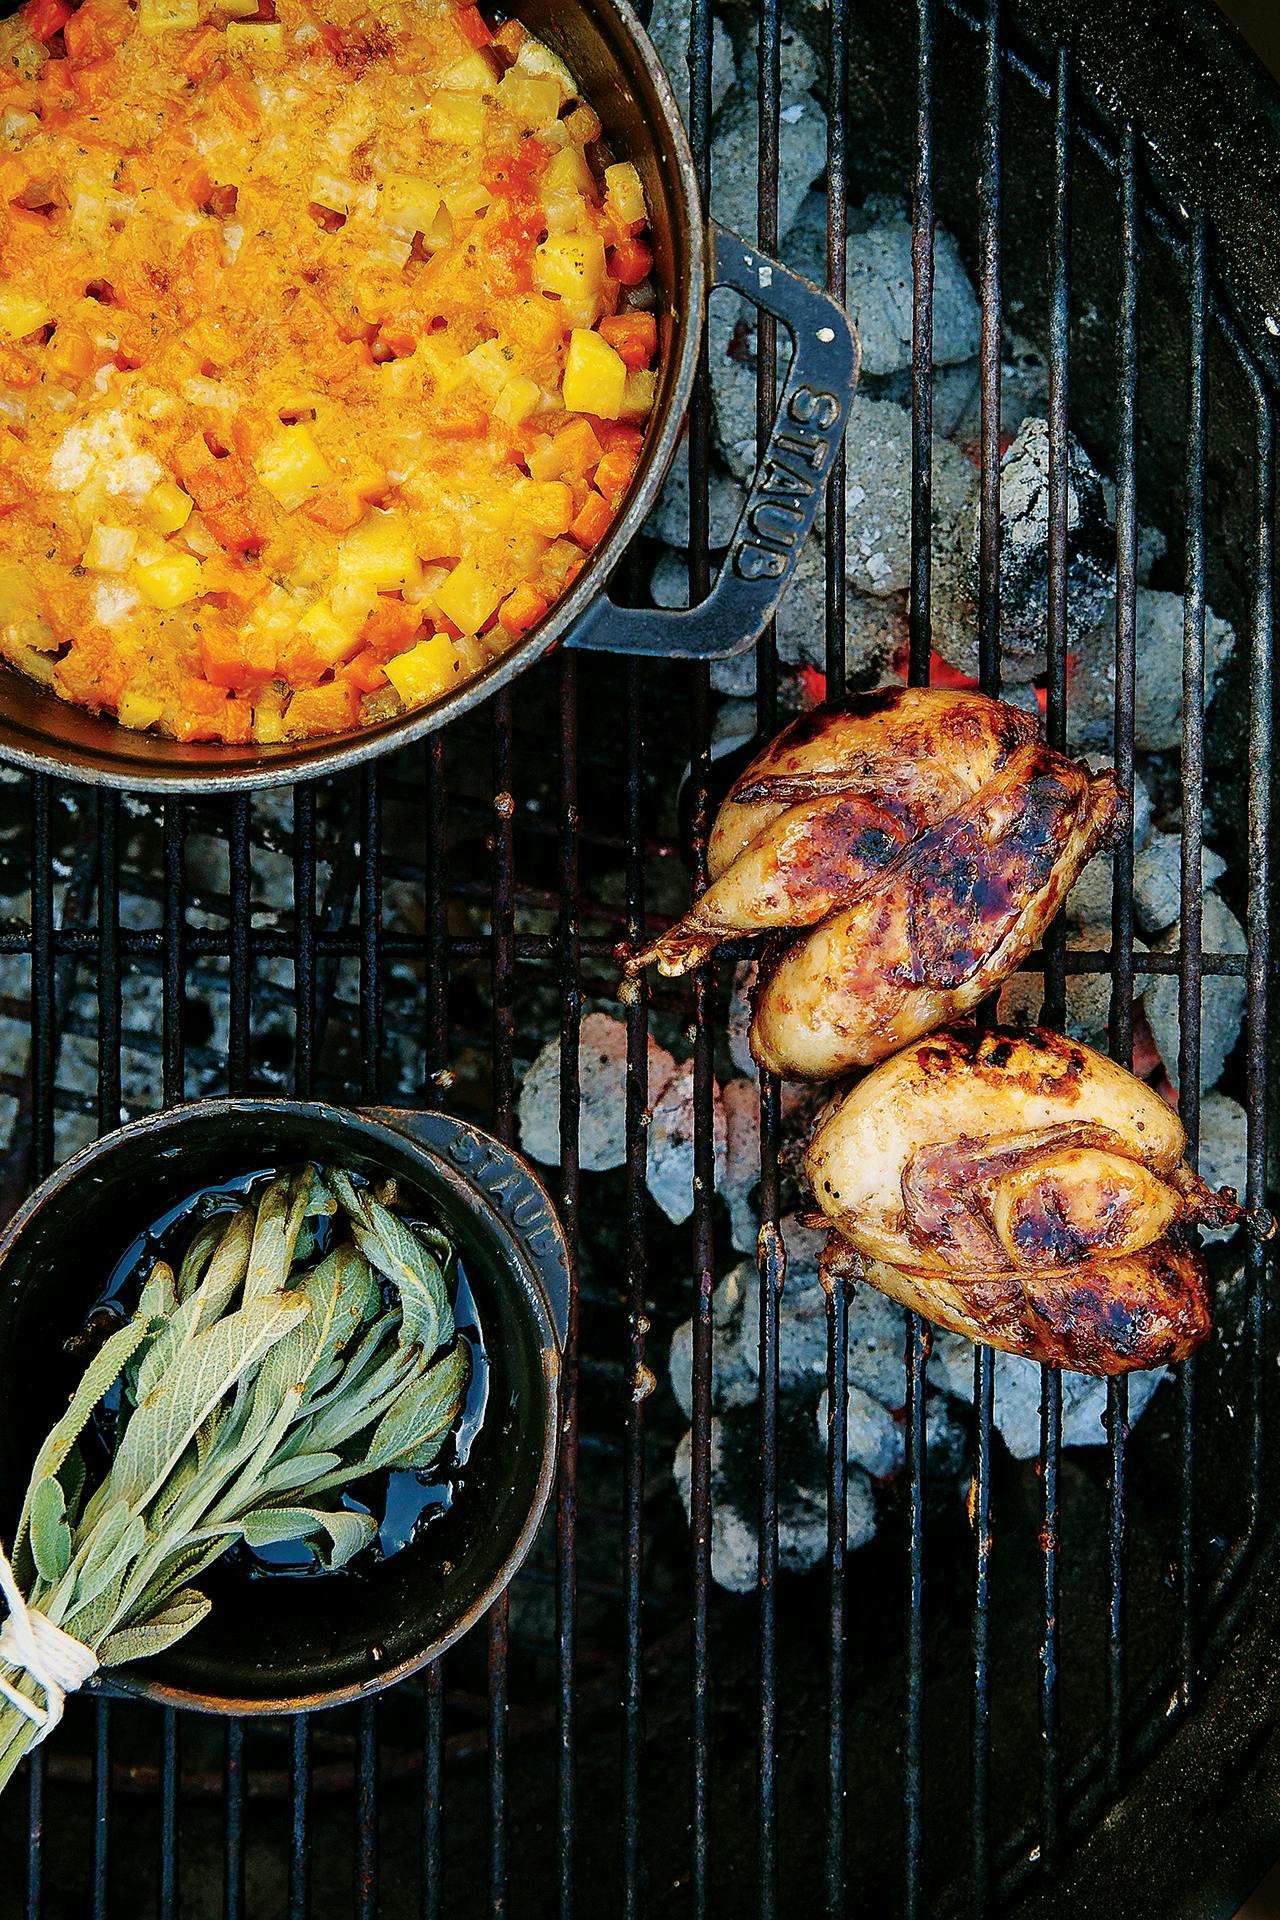
Rico Torres’s Chorizo-Stuffed Quail
 When Rico Torres and Diego Galicia opened Mixtli, their twelve-seat restaurant in San Antonio, in late 2013, their vision was to explore and promote the diversity of Mexican cuisine. (Mixtli is the Nahuatl word for “cloud,” and like a cloud moving over the country, the restaurant’s menu features the cuisine of a different region in Mexico every 45 days.)
 This vision, rooted in the notion of land, came with a commitment from the two chefs and co-owners to source whatever they could locally. And this has meant using quail. “Quail were highly regarded in Aztec folklore,” says Galicia. “They were sacrificed when a new ruler was crowned, and they were associated with the festival of flowers and fertility. In Texas, they’re part of the terroir. They are walking dishes.” Adds Torres: “Their flavor is more assertive than chicken, which means they lend themselves well to grilling, as well as more-unctuous sauces, like ones made with berries, coffee, honey or maple syrup, pecans, and even cactus fruit.” The recipe below, created by Torres, embraces these qualities, pairing quail with chorizo, honey, and winter vegetables. “It is pretty amazing watching a plump, properly cooked quail hit your plate,” marvels Galicia. “And did I say it’s delicious?”
Note: first prepare the Winter Vegetable “Risotto,” found below.
Honey Glaze
2 cups honey, preferably from Texas bees
1 teaspoon Spanish smoked paprika
juice and zest of 1 small lemon
juice and zest of 1 clementine
2 sage leaves
2 basil leaves
In a saucepan, combine all the ingredients over low heat. Remove from heat and keep warm until ready to use.
Quail
8 ounces Spanish chorizo (Aurelia’s), diced
4 quail (brined if you wish), rinsed and patted dry
olive oil for brushing
kosher salt and coarse-ground black pepper, to taste
Preheat grill to medium-high (400 degrees). Push the coals into a ring to create an inner zone of lower heat. In a saucepan, cook the chorizo until it is rendered, then drain. Season cavity of each quail with salt and pepper and stuff with the chorizo. Truss and tie quail legs with kitchen string. Brush skin with olive oil and season with salt and pepper. Start the quail on the hot part of the grill, flipping with tongs every minute or so until lightly browned all over. (Be careful not to tear legs and wings.) Brush the quail with Honey Glaze and move pieces to the inner zone. Cook, turning and lightly glazing every 5 minutes until the juices run clear, 15 to 20 minutes total. Remove to a platter, drizzle with remaining glaze, and allow to rest 5 minutes. Serve atop the Winter Vegetable “Risotto.” Serves 2 to 4.
HOW DO I START MY FIRE?
It’s a matter of preference and setting, really. Use hard-lump wood charcoal, like oak, and keep the lumps together to help the fire spread quickly. If there’s just one thing to remember, it’s this: Never, ever use lighter fluid.

Winter Vegetable “Risotto”
2 tablespoons extra-virgin olive oil
1 tablespoon butter
2 sage leaves
2 basil leaves
1/2 cup diced butternut squash (cut 1/4-inch squ1/2 cup diced sweet potato
1/2 cup diced potato
1/2 cup diced carrot
1/2 cup diced turnip
1/2 cup diced parsnip
2 cloves garlic, minced
2 ounces dry white wine
5 cups vegetable stock, warmed
salt, to taste
1 cup freshly grated Parmesan
Heat oil and butter in a 10- or 12-inch sauté pan over medium-high heat. Fry the sage and basil leaves to season the oil mixture, being careful not to brown them. Discard leaves when done. Add the diced root vegetables and garlic and cook, stirring gently, for 6 minutes; do not brown. Stir in the white wine. Add the warm stock 1 cup at a time (you may not need all of it), stirring continually but gently, so the vegetables do not break up. Cook until tender but still al dente, about 20 minutes.
Remove pan from stove, sprinkle vegetables with salt, and fold in the Parmesan until it melts. The vegetables should be velvety, like a risotto. Cool mixture to room temperature and reserve for plating.
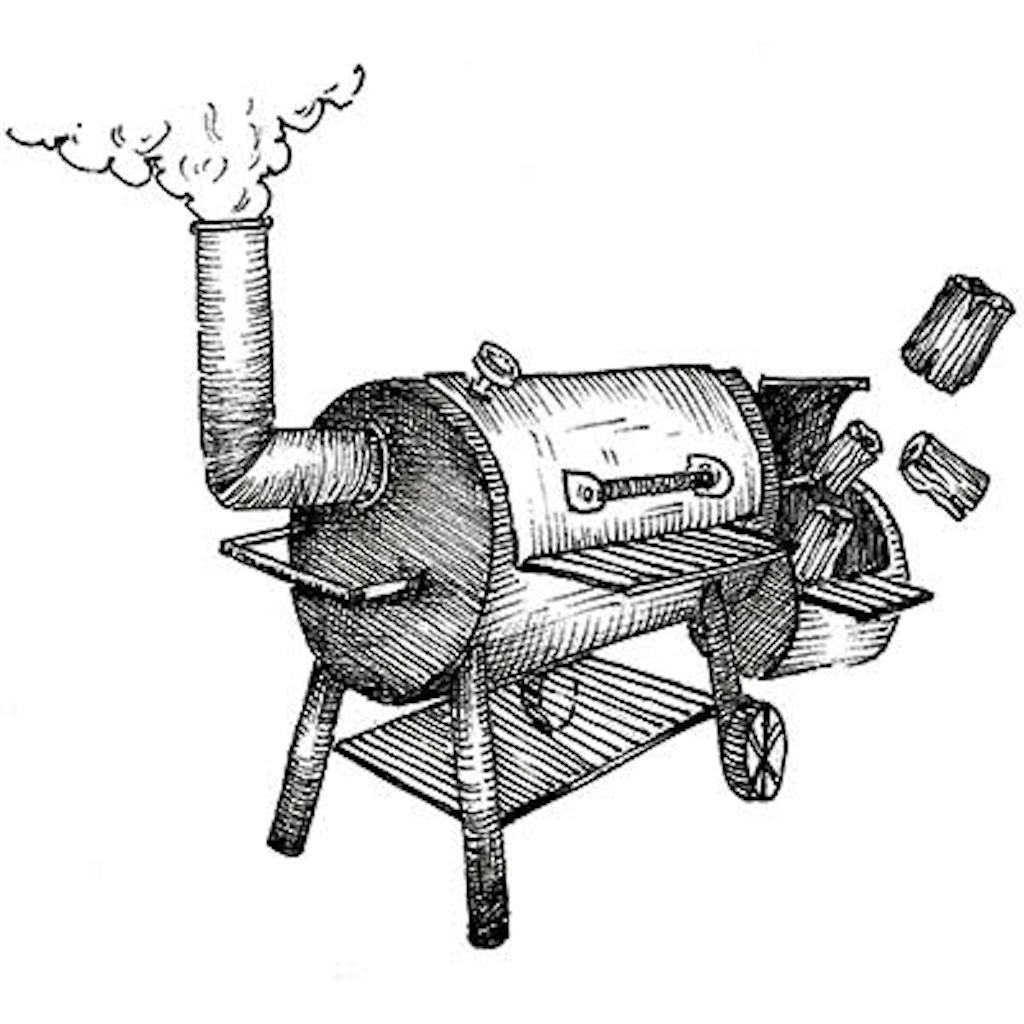
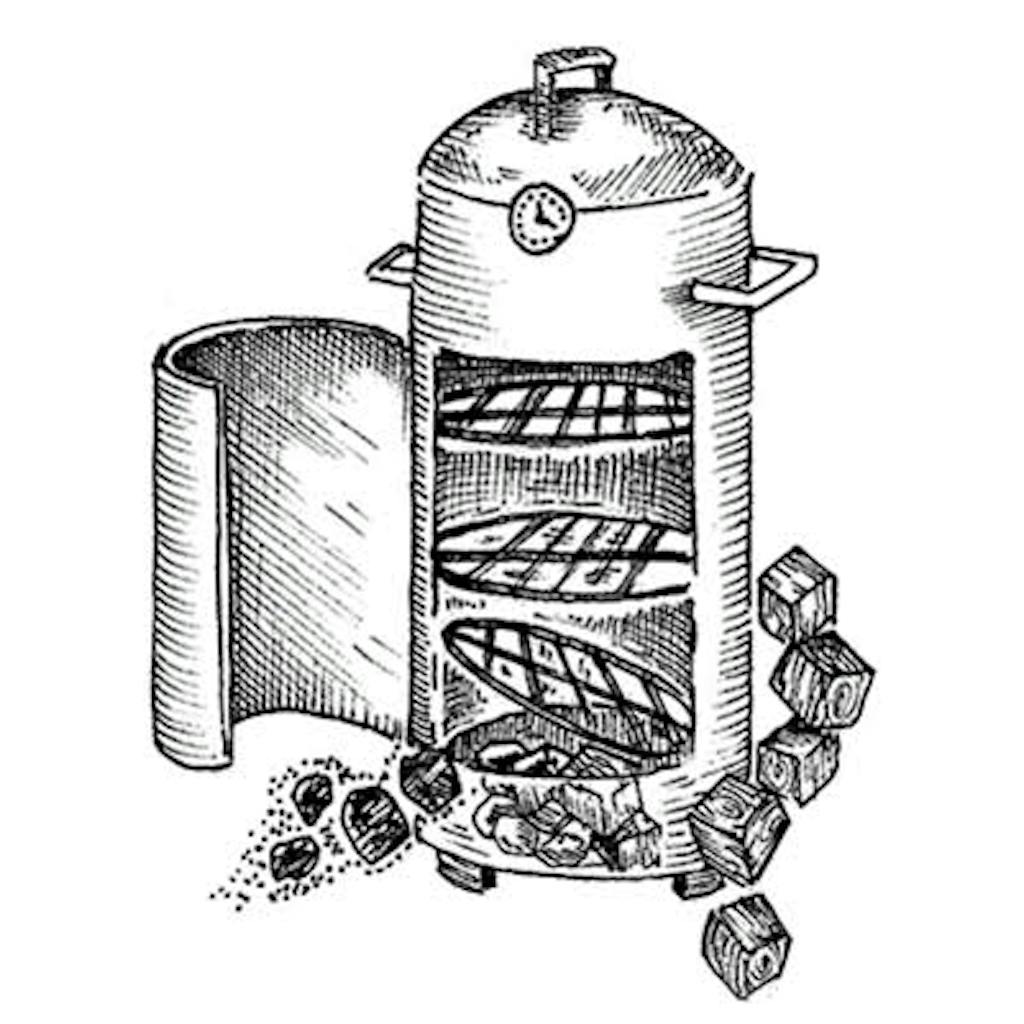
SMOKING
It’s hard to imagine smoked meat being any more popular than it is now, but the truth is that it has long sustained life in Texas, from the kitchens of the early settlers who relied on ham from the smokehouse during winter to the small-town meat markets that discovered that smoking sausages and leftover cuts could keep them in business. An old smoker and a cutting board have launched the livelihood of many an entrepreneur and nourished a multitude of hungry souls ever since. Drive through any small town and you’ll see a steel smoker in about every third yard—proof, if you needed it, of the hold that this fragrant, patience-demanding method of cooking has over our collective psyche. And we’re talking about the front yard. Gas grills and their propane tanks are properly hidden on the back deck, but a smoker you can be proud of. Buy one, and you’ll immediately feel more Texan. Fire it up and the possibilities are as endless as your family’s (and neighbors’) tolerance for barbecue.
Tim Byres’s Texas Hunter’s Sausage
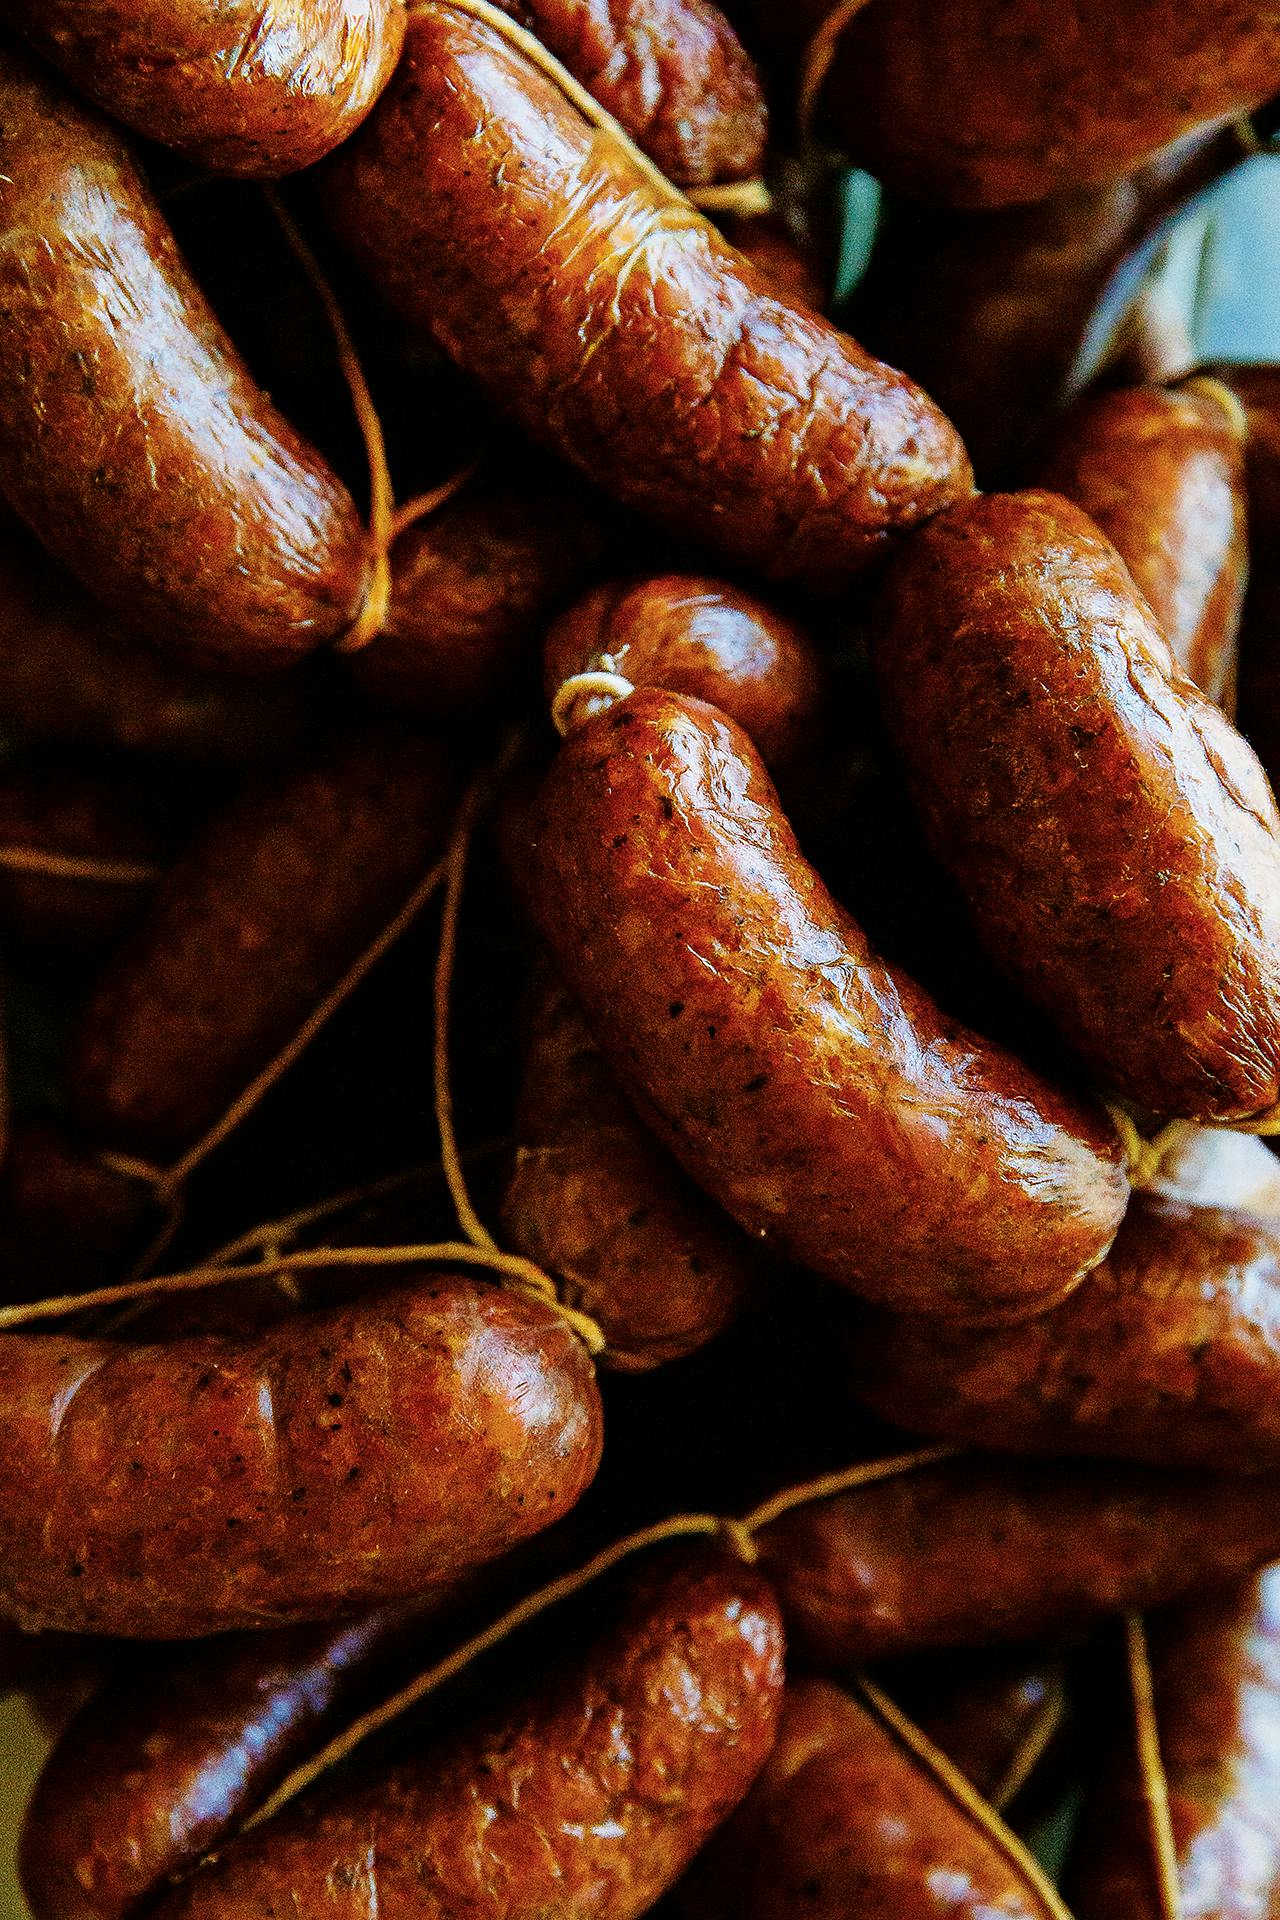
Chef and pitmaster Tim Byres loves seeing how many flavors he can squeeze into casings, and at his restaurant Smoke, which has locations in Dallas and Plano, he’s created a lineup of sausages with plenty of variety, including links of beef, pork, lamb, and rabbit. “Our food is brash, brave, and spicy,” he says. At home, he experiments with wild game. (“I have mountain-sheep sausages in my freezer right now,” he offers by way of example.) Though Byres himself likes cold-smoking his sausage—a method using very low indirect heat and curing salts to preserve meat for long periods—his recipes can be done with any home smoker. The secret, above all, is patience. “You’re taking fat and meat and bonding them together,” says Byres. “So you’ve got to cook slow.”
2 pounds wild boar
2 pounds venison
1 to 2 pounds smoked bacon
2 medium Spanish or yellow onions, coarsely chopped
2 cloves garlic
1 tablespoon destemmed and chopped fresh thyme
1 tablespoon destemmed and chopped fresh
flat-leaf parsley
3 bay leaves, crushed
2 tablespoons rubbed sage
1 tablespoon ground cumin
1/2 teaspoon ground cloves
1/2 teaspoon ground allspice
3 tablespoons kosher or sea salt
1 tablespoon coarse-ground black pepper
1 cup nonfat dry milk
natural pork casing (available in supermarket meat departments)
Note: city folk may substitute pork butt and beef chuck for wild boar and venison, and reduce or omit the bacon.
Remove the grate(s) in your smoker and replace it with sausage dowels (or any thick, wooden rods), or use wood planks as you would for salmon. Prepare the smoker for a low smoke; if it has a thermostat, set it at 130 degrees.
 Using a meat grinder fitted with the coarse plate (3/8 inch), grind the boar, venison, and bacon together. Put mixture in a large bowl and refrigerate (keep it chilled whenever possible while working). In a separate bowl, combine the onions, garlic, thyme, and parsley. Run them through the meat grinder and set aside. Put the bay leaves, sage, cumin, cloves, allspice, salt, pepper, and dry milk in a small bowl and mix with a little water to make a slurry. Using a spoon or your hands, work the onion-herb mixture into the ground meat, then fold in the slurry and grind the mixture again. Refrigerate until the meat is cold, then stuff it into the casing, making 1/4-pound links.
Place the sausages on the dowels or rest them on the planks in the preheated smoker and cook until the casing is dry, about 45 minutes. Increase the heat to 165 or 170 degrees and smoke until the sausages reach an internal temperature of 160 degrees, about 3 hours.
You may eat these “hot links” immediately. Otherwise, submerge them in an ice-water bath to halt the cooking. Remove when cold. They will keep, covered, for at least 3 days in the refrigerator. Makes 5 to 6 pounds.
Ask The Texanist
 Q: How much beer will I need if I’m going to smoke a ten-pound brisket, six racks of ribs, and a mess of sausages? –Sam Dickson, Fort Worth
A: Since the brisket is going to take much longer than the ribs and the links, we can remove the latter two from the formula. Per the conventions of low-and-slow cookery, brisket calls for one ice-cold brew per pound of meat to be smoked. Experience has taught the Texanist to add a few more to this equation to allow for adequate smoker prep, fire ignition, and predictable delays. So, to answer your question, that’s one beer for removing the tarpaulin from your rig, cleaning out the ashes left from the Fourth of July, and grate scraping. One beer for getting the fire going. One beer for seasoning the meats. One beer for actually getting the fire going this time. And then ten for cooking. If the Texanist’s math is correct [sound of old-timey adding machine], that comes to a grand total of fourteen cold ones. This may sound like a lot, but remember that Brian from next door, who is always alerted by the billowing smoke, will, as sure as sunshine, come over and take care of at least half your cooler while “helping out.” Finally, the Texanist also finds that it can be quite enjoyable to finish off the whole process with a nice bourbon. After all, you’ve just spent twelve hours sitting around trying to resist the urge to peek too often. And there’s nothing wrong with raising a glass to a job well done.
Ronnie Killen’s Smoked Beef Short Ribs

Good brisket may be the pinnacle of smoking achievements, but let’s be honest: it requires the kind of patience, attention, and expertise you may not have. Pitmaster Ronnie Killen, who smokes a few hundred briskets every week at his joint in Pearland, Killen’s Barbecue, steers backyard cooks—especially beginners—to beef short ribs. This is because their consistent thickness, straight grain, and generous marbling make for easier, and faster, cooking. (“I’m not going to say they’re idiot-proof, but they’re close,” he says.) Killen serves whole beef ribs at the restaurant, but he says you can ask your butcher to cut the rack in half for easier cooking and eating. In fact, he confesses, he himself has never been able to finish a whole beef rib in one sitting, though he’s watched linemen for the Houston Texans polish off two at a time. “Those boys can eat!” he says.
Beef chuck short ribs are easier to find, but beef plate short ribs are what Killen likes best. If you can, buy hormone- and antibiotic-free meat (“The fat renders—or melts—better,” he says) and use dry, not green, wood. Killen offers the following directions as a guideline, but it’s perfectly fine to cook slower or faster.
1/4 cup kosher or sea salt
3/4 cup coarse-ground
black pepper
3-bone rack of beef plate short ribs, or a 4-bone rack of beef chuck short ribs (3 to 5 pounds)
Preheat your smoker for low heat (if it has a thermostat, set it to 225 degrees). Mix salt and pepper in a large bowl and coat meat generously; you want a heavy bark, or crust. Place ribs in smoker and cook to an internal temperature of 195 to 203 degrees, about 9 hours. (You can also get good results cooking at 300 degrees for 4 hours.) Let meat rest at least 20 minutes before slicing. Serves 6.
FOR THE TEXAVORE If you don’t have access to a wood supplier or a forest, Western Premium BBQ Products, based in Pleasanton, offers quality chunks and chips; the company also packages oak, pecan, hickory, and mesquite logs (available online and at most grocery and sporting goods stores).
WHAT KIND OF WOOD DO I SMOKE WITH?
The immediate answer is simple: hardwood. In Texas, the most popular choices are—from strong to mild—mesquite, hickory, oak, and pecan. (Soft woods like pine or cedar will give your food a bitter taste.) After that, how you go about creating smoke depends on your equipment.
Advertisement
FRYING
Could the truest Texas foods even exist were it not for the act, the skill—nay, the very art—of frying? Think: no catfish, no enchiladas or puffy tacos, no chips to dip into our salsa. Imagine life without chicken-fried steak, that certified birthright handed down by our chuck-wagon forebears, or with no fried pies, whose absence would make existence in this state so dull. Any Texan worth his or her salt must know how to fry, and to fry well, for to fill one’s home and senses with the sizzle and aroma of something crisping on the stove to golden, finger-licking perfection is to savor and celebrate who we are.
Keith Hicks’s Fried Chicken

Thanks to his two grandmothers, both great cooks, Keith Hicks understood from an early age that “love needs to be put into the food,” as he says. After honing his own cooking skills—first at an Army mess hall in New Jersey and then at Wolfgang Puck’s cafe in California—the West Virginia native landed in Texas in 2000, where he has since earned a following for his fried chicken and waffles. The dish is a runaway hit at Buttons, the upscale soul food restaurant in Fort Worth that bears his childhood nickname. “Everyone’s looking for a little comfort in their food,” says Hicks, “and you’ll find it in our fried chicken.” The secret, he says, is to brine the chicken first and add a pinch of your mama’s love to the flour. You’ll end up with a platter of pieces that embody that magical balance: crunchy, juicy, and ever so slightly spicy.
 6 tablespoons kosher or sea salt
1/2 tablespoon coarse-ground black pepper
1 1/2 tablespoons garlic powder
1 1/2 tablespoons onion powder
1 tablespoon poultry seasoning
2 bay leaves
2 teaspoons cayenne, divided
10 chicken breast halves
2 cups flour
salt and pepper, to taste
4 cups peanut or canola oil for frying
1 yellow onion, cut into chunks
Brine: Put the first 6 ingredients and 1 teaspoon of the cayenne in a large pot along with 2 quarts (8 cups) of water and boil for 1 minute. Lower heat to a simmer and stir until the salt is dissolved. Remove from heat, cover, and cool to room temperature, about an hour; then refrigerate for another couple of hours. Transfer to a container with a tight-fitting lid. Submerge the chicken pieces and brine for four hours, or up to overnight, refrigerated.
Chicken: Combine flour, remaining cayenne, salt, and pepper and set aside. Pat the brined pieces very dry with paper towels and dredge in the seasoned flour mix. Pour about 1/3 inch of oil into a large cast-iron skillet and heat to a little more than medium-high, or 350 degrees, adding the onion for flavor. Fry chicken in batches until bottom side is golden brown, keeping temperature constant. Using tongs, turn and fry the other side. Drain on paper towels. Serves 5 to 10.

![feature-htclat-texanist-corndog]() Ask The Texanist
Ask The Texanist
Q: I want to enter the fried-food competition at the state fair next year. Got any ideas for a surefire winner? Sammie Sloan, Waxahachie
A: The Texanist is sorry to break the news before you’ve even had the chance to heat up the oil, but one cannot enter the State Fair of Texas’s Big Tex Choice Awards unless one is a state fair concessionaire. The Texanist, therefore, sees only one path to greasy glory: Start by stockpiling vast amounts of canola. Then perfect your battering technique until the tongs are like a maestro’s baton in your hand. Wield a fry basket tirelessly until it becomes an extension of your arm. Submerge unholy combinations of foodstuffs into oily depths until your creations glisten. Cultivate your fan base with free samples. And then, finally, submit an application at Fair Park. You’ll be one of many, many applicants—this is the largest state fair in the country—but the Texanist is certain you’ll rise through the ranks and be contending by the year 2025, at least. Fried White Gravy Sticks? Fried Chili Balls? Chick-O-Stick-Covered Fried Chocolate Gobs? Fried Pork Ribsicles? The Texanist submits these suggestions and eagerly anticipates your coronation.
Mark Holley’s Fried Shrimp
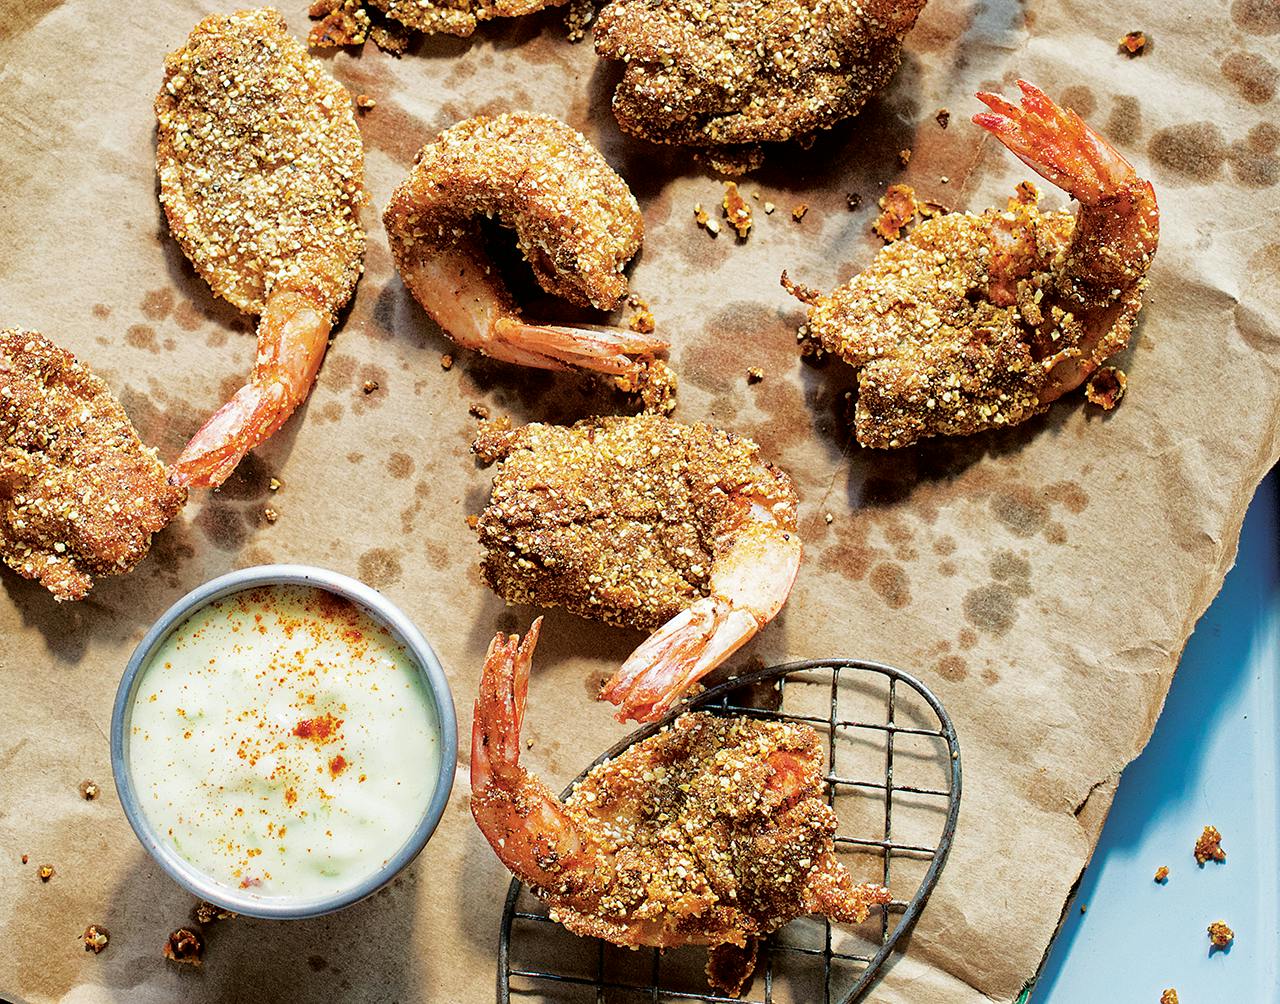
Mark Holley, a genius at cooking all things pulled from the water, honed his craft at such places as Commander’s Palace, in New Orleans, and Pesce, in Houston, before opening his namesake place in H-Town’s Midtown. Although fried shrimp isn’t a regular feature on his menu, Holley enjoys preparing it for his family. “I have fried a lot of shrimp in my time, and there’s nothing better than using them fresh from the Gulf,” he says. When it comes to the coating, he leans toward classic cornmeal, adding some corn flour and Creole seasoning “for extra crunch and character.” When it comes to the eating, he adds a twist: his own serrano aioli.
Creole Seasoning
1 tablespoon kosher salt
1 1/2 tablespoons medium-grind
black pepper
1 tablespoon granulated garlic
1 tablespoon granulated onion
1/2 tablespoon cayenne
2 tablespoons paprika
1 tablespoon dried oregano
1 tablespoon dried thyme
Mix all ingredients and set aside. Makes about 1/2 cup. (Seasoning will keep, tightly covered, for several weeks.)
Shrimp
3 cups peanut or canola oil for frying
2 cups coarse yellow cornmeal
1 cup corn flour
1/4 cup Creole Seasoning
2 pounds medium-sized or larger
shrimp, peeled, deveined and butterflied, tails left on
salt and pepper, to taste
1 cup buttermilk
 Pour enough oil into a cast-iron skillet to cover shrimp halfway. Heat to 350 degrees (a tad over medium-high). Mix cornmeal, corn flour, and Creole Seasoning in a large bowl. Lightly season shrimp with salt and pepper, then dip in buttermilk. Dredge in cornmeal mixture, pressing to coat. Shake off excess. Cook shrimp until bottom side is golden brown, keeping temperature constant. Turn with tongs and brown other side, adding oil if necessary. Drain on paper towels. Eat hot with Serrano Aioli (see below). Serves 4.
FOR THE TEXAVORE An excellent cornmeal to use is Lamb’s Gristmill, which is stone-ground near Victoria (available at H-E-B stores and online), or Homestead Gristmill, from Waco (available online).
HOW DO I SEASON MY SKILLET?
Yes, we know: cast-iron skillets nowadays come (supposedly) preseasoned. But if you’re going for real taste, you should season the pan yourself anyway. No one knows how to do this better than Terry Chandler, the owner of Fred’s Texas Cafe, in Fort Worth, and the chief cook on the historic Ought Zero Chuck Wagon. Here’s his method for restoring a skillet whenever it hasn’t been used in a while, smells like food or old oil, or is burned from baking.
Serrano Aioli
1 large egg (both yolk and white)
2 cloves garlic
1 1/2 tablespoons white vinegar
1/2 teaspoon kosher salt
1/4 teaspoon black pepper
2 teaspoons lime juice
1 cup grapeseed or canola or other mild oil
1/4 cup minced shallots
2 serrano chiles, thinly sliced, with seeds
zest of 1/2 lime
In a blender, mix first six ingredients for a minute; slowly add oil until it emulsifies. Pour into a bowl and stir in shallots, chiles, and lime zest. Taste, adding salt if necessary. Makes about 1 1/2 cups.
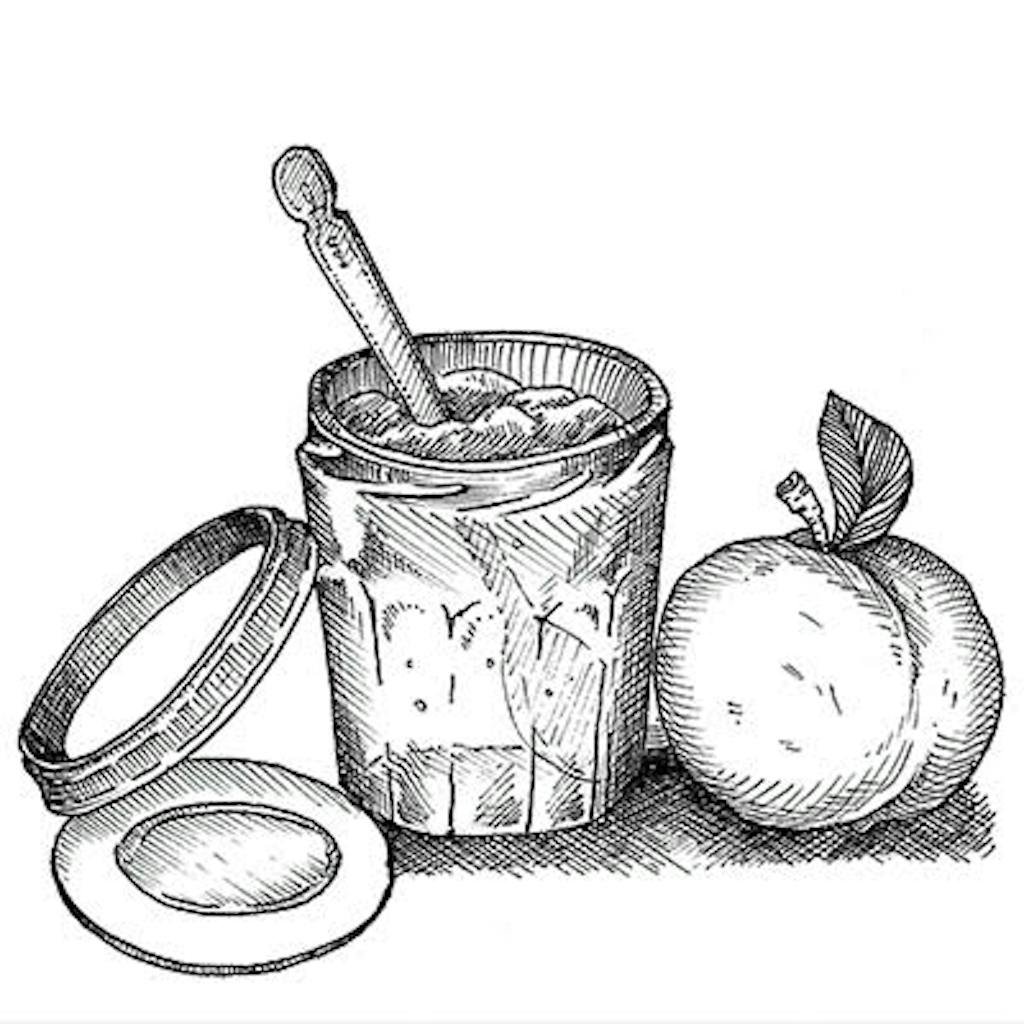
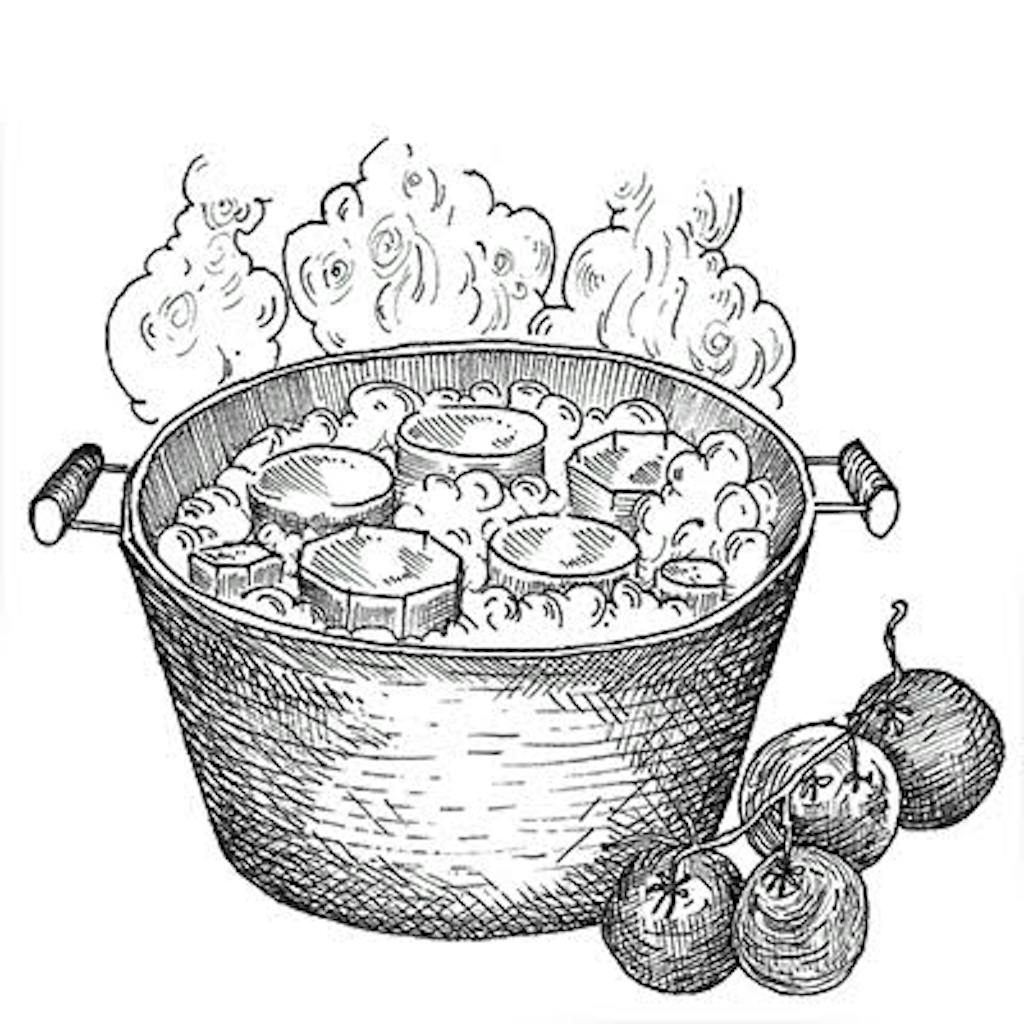
PUTTING UP
There was a time, and not so long ago, when everyone knew what “putting up” meant. Each year, as fruits and vegetables ripened across the land, the womenfolk of America got to work. Pots bubbled away on stoves, and kitchens turned into assembly lines. Men were drafted for harvesting and lifting, while children got underfoot and sneaked bites when nobody was looking. At the end of the day, the juicy freshness of summer had been
funneled into tidy glass jars, glowing amber and russet from root cellars and pantries. Nowhere was the practice more vital than for the folks who lived in rural Texas, where towns were small and distances vast. Though preserving and canning and pickling are no longer a necessity, it still satisfies the soul to lay in a supply of the elemental, untamed tastes of Texas. Plus there’s a bonus: those jewel-toned jars make excellent gifts.
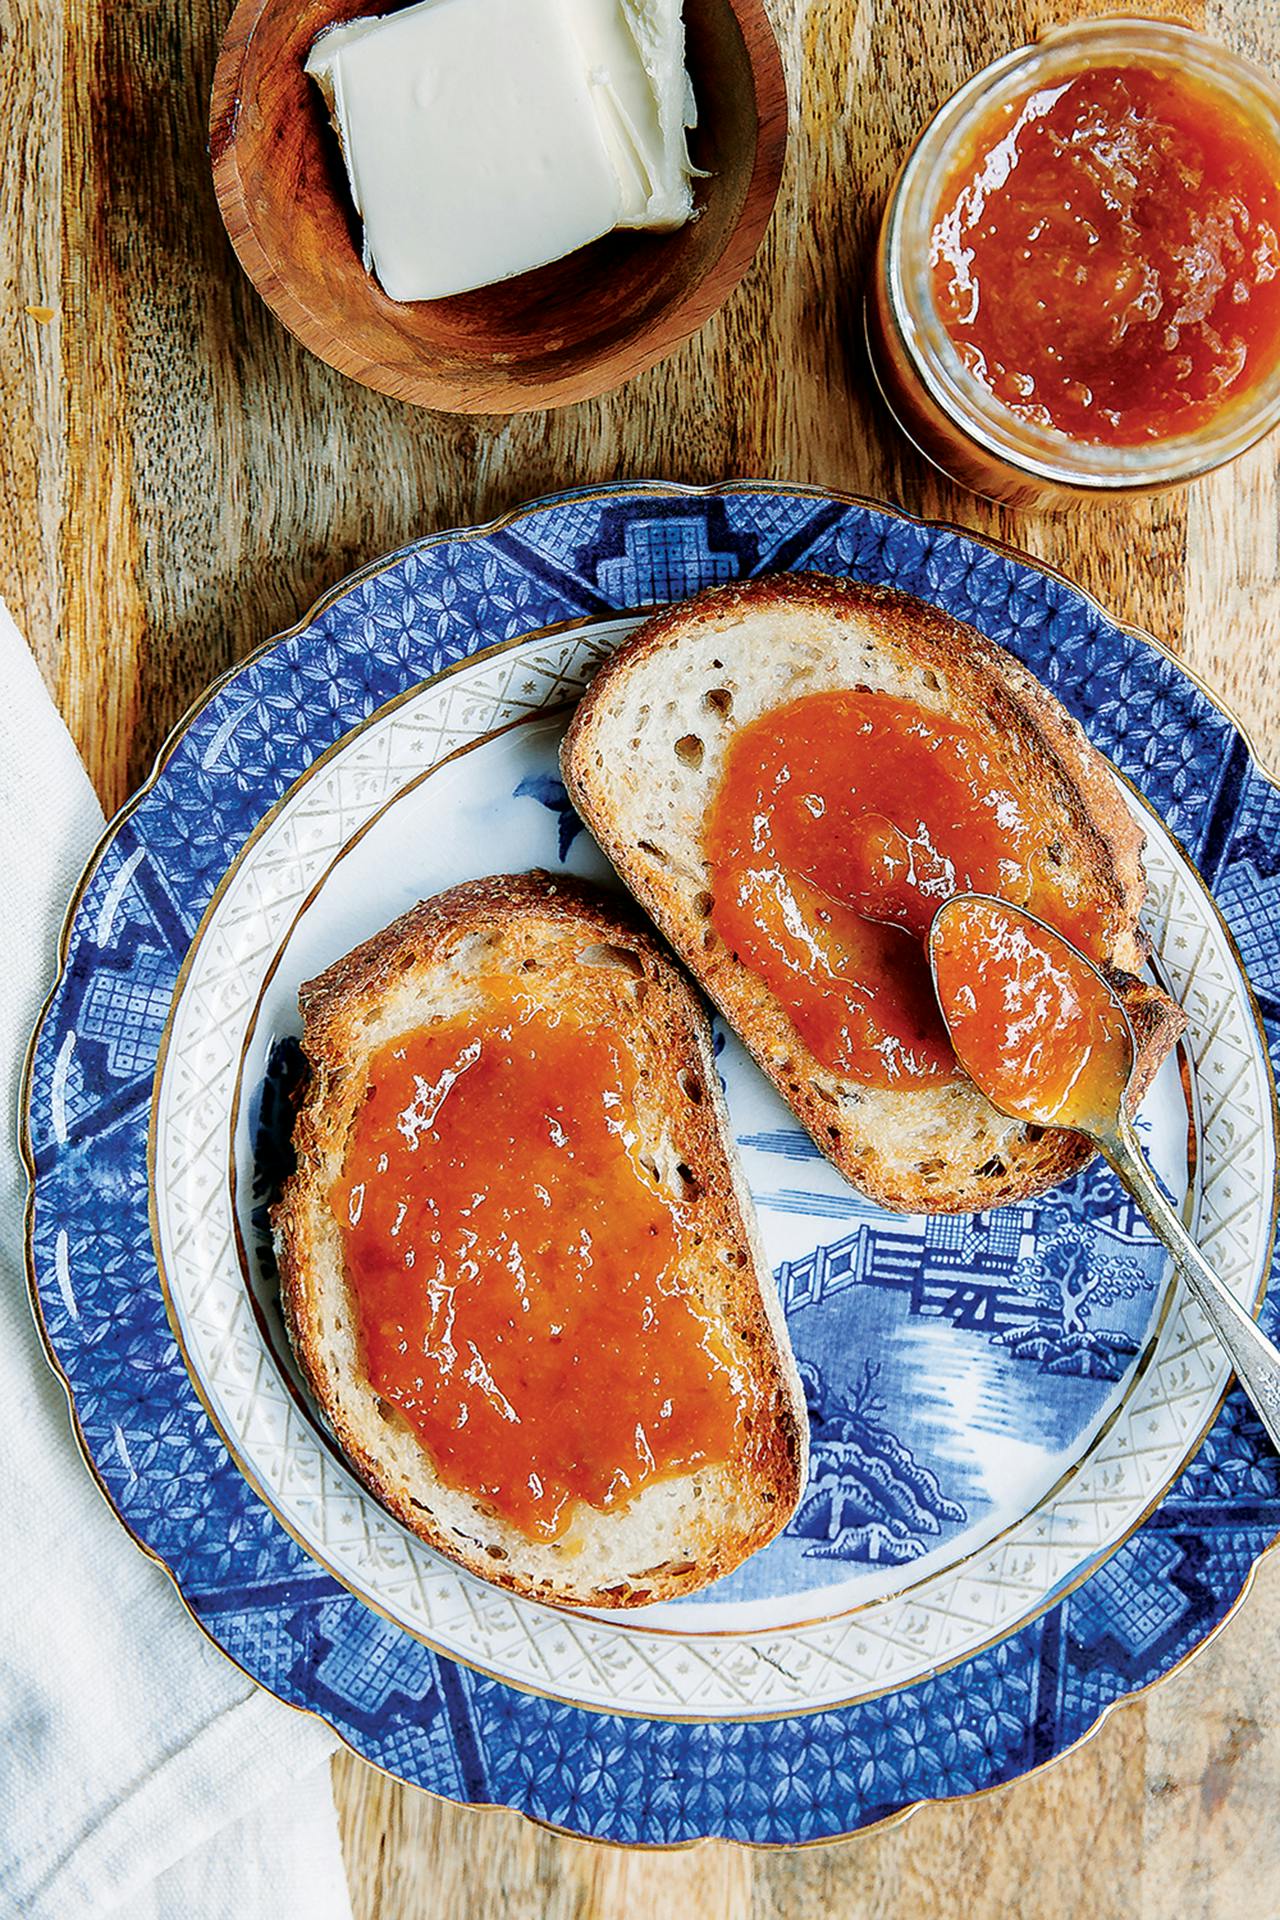
Stephanie McClenny’s Peach Preserves
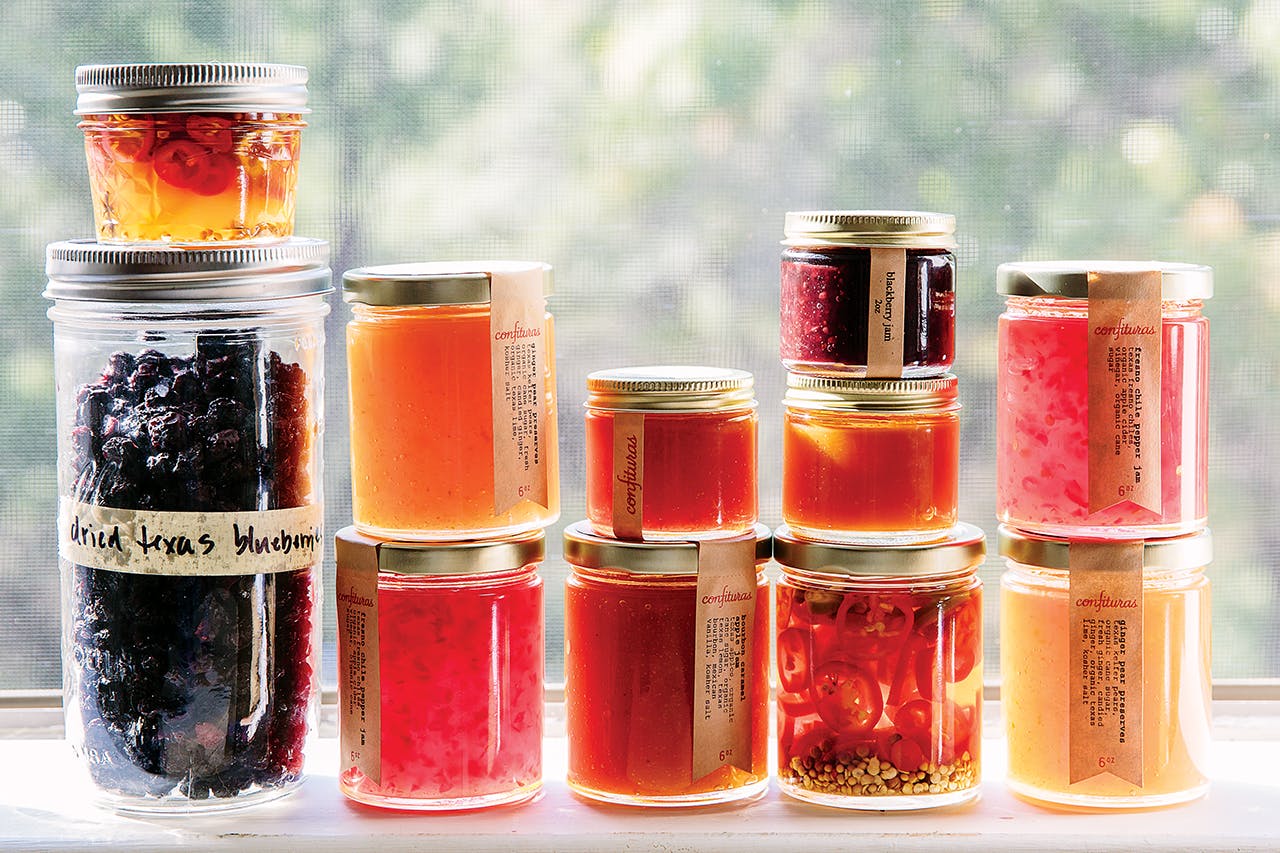
Six years ago, a hundred pounds of tomatoes changed Stephanie McClenny’s life. “I had bought all these tomatoes,” she says, “and I was standing in my kitchen wondering if I had lost my mind.” She was dreading the long, hard slog of canning  them because she’d done it before. “But then I began to think how wonderful it would be to have dozens of beautiful jars that I had put up myself, at their peak of ripeness.” She forged ahead, and, as she stirred and measured and poured, something about her life snapped into focus. Like so many people in Austin, McClenny had moved to the city for the music and ended up staying, cobbling together careers as a waitress, a restaurant co-owner, a nurse. No more. She would now be a maker of confitures—a word from the French confit, meaning preserved foods. She founded a company named Confituras and began selling jams and preserves, many of them prize-winning. Though McClenny has a knack for experimental combinations—blueberries with basil, pears with honey and sage—her spirit is soothed by the simple flavors she started with. Whenever she can, she and her crew go foraging in the country or the scrubby, untended places in town to seek out mustang grapes, agarita berries, blueberries, and, most of all, peaches.
4 pounds local peaches, peeled and pitted
2 pounds sugar (McClenny prefers organic)
juice of 1 large lemon
Note: in the winter, any kind of pear makes an easy substitute for peaches. Just choose fruit that is ripe but not too soft.
Put a small plate or saucer in your freezer to use later for testing. Cut the peaches into 1-inch pieces and put them, along with the sugar and lemon juice, in a wide, heavy-bottomed pot over low heat and stir until the sugar melts. When the mixture no longer feels grainy, crank up the heat to medium-high. (Careful—it can foam up and boil over quickly!) Stir every now and then with a spatula and scrape the bottom to prevent scorching, doing so more frequently as the mixture thickens. Skim off the foam with a spoon as needed to allow the mixture to “breathe.” For a smoother texture, gently mash the peaches with a potato masher or puree with an immersion blender. After about 20 minutes, when mixture looks “jammy” (large, thick, shiny bubbles), put a dollop on the cold plate to test the gel: if it wrinkles when you touch it with your finger, it’s ready. Cool slightly, then pour into clean jars, leaving half an inch headroom, and refrigerate. The preserves will keep for several months. Makes about 3 pints. (For instructions on canning these and other preserves, see below.)
FOR THE TEXAVORE: For preserves with a kick, add 1/4 cup or more Treaty Oak Red-Handed Bourbon, made in Dripping Springs (widely available in stores).

![feature-htclat-texanist-pickled-eggs]() Ask The Texanist
Ask The Texanist
Q: Whatever happened to those big jars of pickled eggs that used to be
a staple at many a Texas bar? –Leonard Moore, Dallas
A: Indeed, it was once the rare Texas beer joint that didn’t offer pickled eggs (and pickled pigs’ feet) to its pickled patrons. And for a pretty paltry price, if the Texanist’s memory serves. The demise of these tantalizingly tart treats—the Texanist once ate six in one sitting—seems to have coincided with the disappearance of the very dives in which they were once found. The real question is not “Where did all the jars of pickled eggs go?” but rather “What the hell happened to those watering holes with their perpetually stocked vinegary vessels?” And the answer, it seems, is that they have been mostly sunk by a wave of lavender-infused simple syrups and gigantic ice cubes. The Texanist—despite having recently been seduced by the smoky (and pricey) allure of a quite delicious Medicina Latina at yet another new Austin cocktail bar—stands, with torch and pickle fork in hand, firmly(ish) opposed to this sort of fancification.
Instructions for canning
If you want to can your preserves—making them shelf stable at room temperature like your great-grandmother’s—follow these instructions: Fill a hot-water-bath canner or other large pot with water and bring to a boil. Using canning tongs, put your clean empty jars in the water up to their necks and turn off the heat. They will stay hot while you work.
When your preserves are made, remove the jars from the water and fill them. Then apply lids and screw on bands firmly but not as tight as possible. Bring water back to a boil and place the jars carefully in the bath using canning tongs (the jars should be covered by at least an inch of water).
Boil the jars for 10 minutes, starting the timing when the water returns to a boil again. Remove the jars from the canner and leave them undisturbed at room temperature for 24 hours. When each jar seals itself, forming a vacuum, you will hear a small pop. Be sure all the jars have sealed. Any unsealed ones should be refrigerated.
SHOULD I PRESERVE, PICKLE, OR CAN?
It all depends, of course, on the fruit or vegetable in question and how soon you want to eat it. Start by educating yourself: for an engaging survey, with recipes, check out The Joy of Jams, Jellies, and Other Sweet Preserves, by Linda Ziedrick (there’s a companion book on pickling). You’ll find good technical information in The All New Ball Book of Canning and Preserving, and there’s always YouTube for instructional fun.
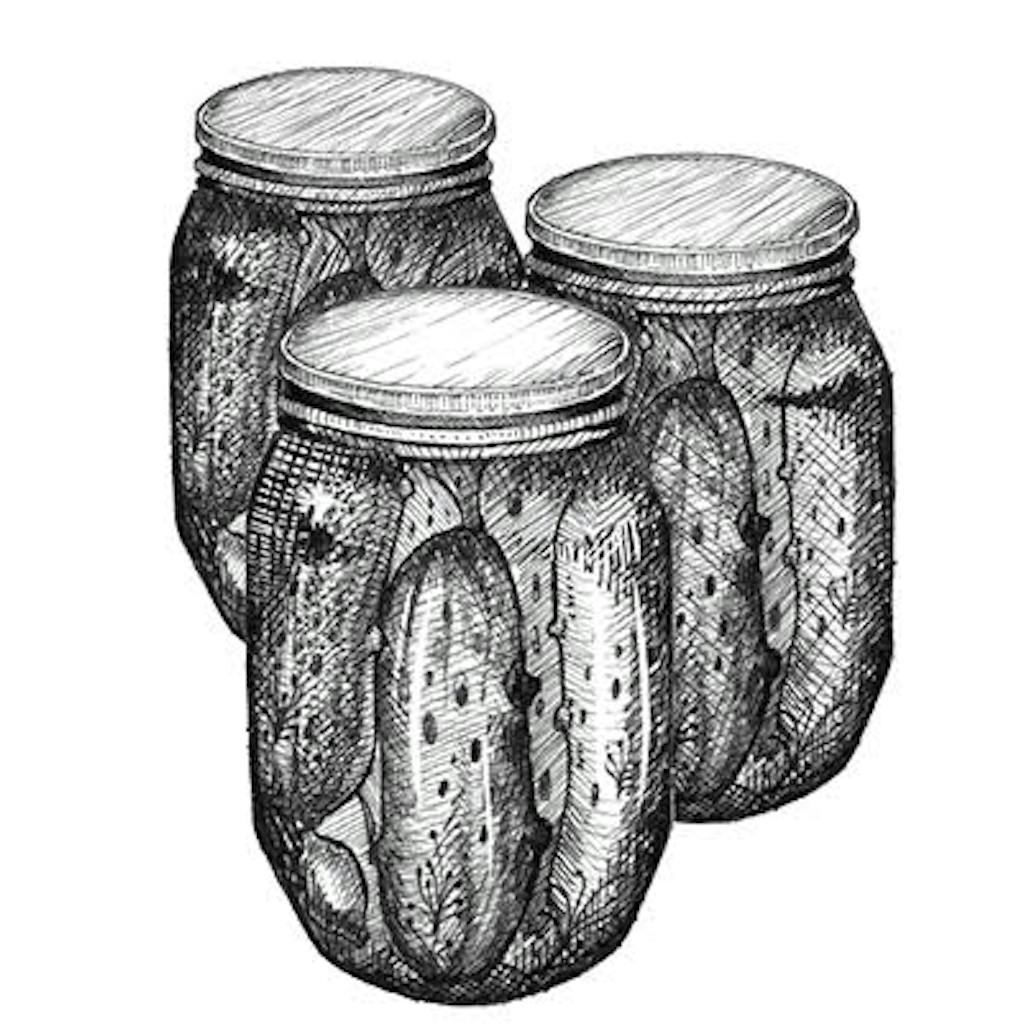
Bread-and-Butter Pickled Jalapeños
2 pounds fresh jalapeños
4 cups organic apple cider vinegar or
distilled white vinegar
2 1/2 cups sugar
1 tablespoon whole mustard seeds
1 tablespoon whole cloves
1 tablespoon whole allspice
3 cinnamon sticks
Note: wear latex gloves while handling the jalapeños or you’ll be sorry.
Remove stems from peppers and slice thinly. Pack the slices into clean 4-ounce canning jars. In a saucepan, combine the vinegar, sugar, and spices and bring to a boil, then simmer until the sugar is dissolved. Pour the liquid over the jalapeños, spooning some of the whole spices into the jars as well. Allow to cool. These pickles will keep in the refrigerator for a year or more. (If you want to store them at room temperature, you may can the chiles according to the directions above, leaving 1/4-inch headspace at the top of the jar.) Yields 8 to 10 four-ounce jars
FOR THE TEXAVORE: A classic pairing has these pickles served with cream cheese and crackers. For a fancier presentation, try a fresh chêvre from Pure Luck Farm, near Austin; Blue Heron Farm, outside Houston; or Latte Da Dairy, in the Dallas area.
BAKING
Baking is a leap of faith, one that begins with wrestling a wet lump of ingredients and ends with unveiling a (hopefully) golden creation from the oven. Texans have been delighting in this mystery since at least the days of campfire biscuits—when a warm, wafting scent was how a chuck-wagon cook might have determined doneness—and definitely before the advent of mass production, when our great-grandmothers were forced to beat finicky dough into submission using only a wooden spoon. Modern conveniences like scales and mixers have since taken out some of the sweat and guesswork, but the ineffable power of baking remains. Is there anything more satisfying than dredging your fingers through soft flour? Anything more intoxicating than a slow-building, buttery aroma? To watch a mound of dough transform before your eyes and finally melt upon your tongue—this is a miracle.
David Norman’s Buttermilk Biscuits

David Norman may have built his baking career in New York City, but he comes by his Texas biscuits honestly. In 2002 he left his job as a baker at Manhattan’s Bouley Bakery and moved with his girlfriend (now wife) to the teeny Hill Country town of Rio Frio, where the two ran the Hart & Hind fitness ranch for four years. Though Norman has since become the “head doughpuncher” at the Austin bakery and beer garden Easy Tiger, it was at the ranch that he perfected his buttermilk biscuits, whipping up campfire breakfasts for guests with a Dutch oven that he placed atop, and covered with, red-hot coals (this allowed the simple, quick drop biscuits to bake more evenly). To make these at home, where you likely won’t be shoveling embers, Norman recommends taking the extra step of rolling out the dough. This will redistribute the butter to create gorgeous, layered biscuits you’ll want to eat at breakfast, dinner, or anytime in between.
3 cups all-purpose flour
1 tablespoon baking powder
2 teaspoons baking soda
1 teaspoon kosher salt
1 stick (4 ounces) cold unsalted butter
1 cup buttermilk
Preheat oven to 450 degrees. Mix the flour, baking powder, soda, and salt in a large bowl. Cut in the butter with a pastry blender until you have pea-size pieces. Add the buttermilk and blend just until the flour is moistened. Avoid overworking the dough.
 At this point, you have two options. You can work the dough a little more so it won’t crumble and then make drop biscuits by scooping spoonfuls of dough onto a baking tray lined with parchment paper. Or you can make flakier rolled biscuits. Turn the dough out onto a well-floured surface, dust the top with more flour, and roll into a rectangle about 1/2 inch thick. It should be roughly three times as long as it is wide. Fold the lower third over the middle and then fold the upper third over that, as if you were folding a business letter. Rotate the dough 90 degrees and roll out again, repeating the folds. Repeat a third time, then roll out to about 1 inch thick. Cut with a 2-inch biscuit cutter. Place biscuits on a baking tray lined with parchment and bake until golden brown on top, about 12 minutes. Turn the tray 180 degrees halfway through for more-even results. Remove from oven and let cool on a wire rack. Makes 1 dozen.

![feature-htclat-texanist-kolaches]() Ask The Texanist
Ask The Texanist
Q: If you were stranded on a deserted island and could have either a dozen kolaches or a dozen biscuits or a dozen doughnuts, which would you choose? –Name Withheld
A: The Texanist, to the detriment of his waistline, is a fan of all sorts of baked goods, but faced with the grim scenario you have laid out, he, a natural-born Central Texan raised on Czech confections, would be compelled to ask the nice lady behind the counter (at Green’s Sausage House, in Zabcikville) for, please, one poppyseed, one apricot, one blueberry, one cherry, one apple, one pineapple, one peach, one strawberry, one lemon, one cream cheese, one cottage cheese, and two prune. The unwritten rule of the baker’s dozen will prove to be quite handy, as that thirteenth kolache, or Wilson, as the Texanist calls him, will make for mighty tasty company.
Sarah Junek’s Spiced Prune Kolaches
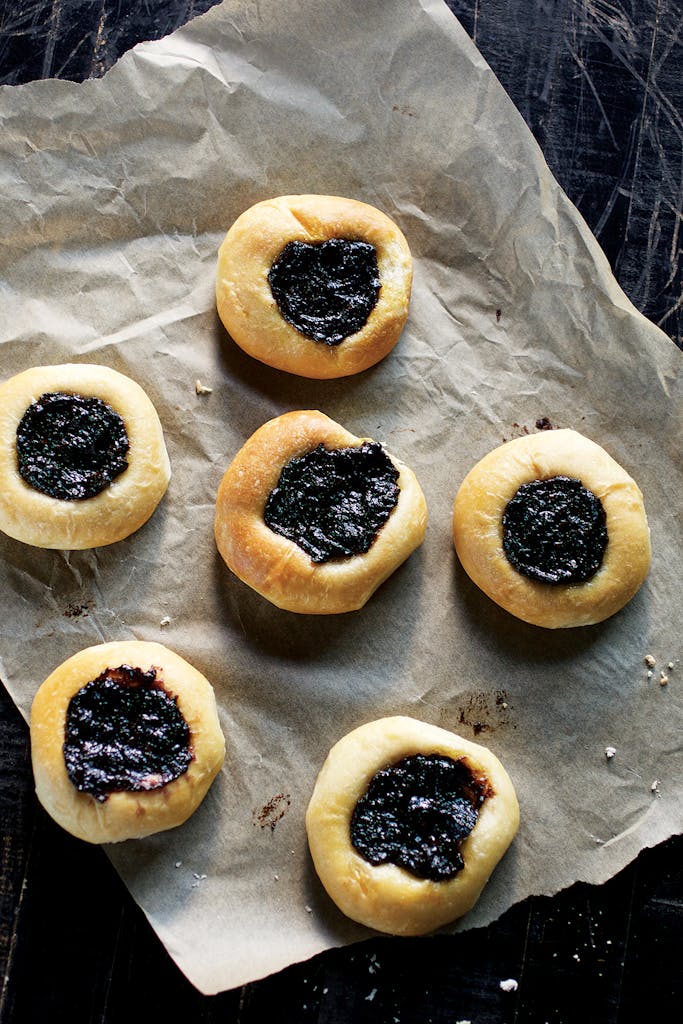
Though she has made thousands of kolaches, which she serves at the historic Spur Hotel, in Archer City, Sarah Junek is reluctant to call herself an expert. You might say instead that Junek—who is also the co-founder of the Archer City Story Center, a nonprofit that aims to nurture storytellers—is an unabashedly devoted student of the kolache. Her interest in her family’s Czech heritage landed her last year in the kitchen of Lydia Faust, a baker in the little town of Snook whose name is synonymous with legendary kolaches. The 83-year-old Faust, who ran the Snook Baking Company for almost 50 years and still serves on the Caldwell Kolache Festival committee, was happy to share the secrets of her yeasty, buttery (and labor-intensive) pastries. This particular recipe—a distillation of Junek’s learning, with a punchy version of the traditional prune filling—may look intimidating, but Junek swears it’s worth the effort. She recalls an old Czech saying: “Without work, there are no kolaches.”
Note: make Kolache Dough first, found on page 186. You will need 3 half-sheet baking pans, a.k.a. jelly roll pans, each measuring 18 by 12 or 13 inches.
Kolache Dough
2 tablespoons active dry yeast
1/3 cup plus 1 tablespoon sugar, divided
1/2 cup unsalted butter plus at least 1/2 cup for brushing
1/4 cup lard
2 cups whole milk
1 tablespoon kosher salt
2 eggs and 1 egg yolk
7 cups sifted flour, divided
Preheat oven to very low (150 to 170 degrees) and turn off. In a small bowl or pan, heat 1/2 cup water to 110 degrees and add yeast and 1 tablespoon of the sugar. Let rest for 5 minutes to proof (the yeast will start to bloom in the bowl). Meanwhile, in a heavy-bottomed saucepan over medium heat, melt the butter and lard and add milk, whisking continually until mixture reaches scalding temperature, 180 degrees (bubbles will start forming around the edge of the pan; it’s done when they reach the middle). Set aside to cool slightly.
In a large stainless-steel bowl, use a wooden spoon to thoroughly mix the remaining sugar, salt, eggs, and yolk. Slowly add the slightly cooled milk mixture and then the yeast mixture. Add 3 cups of the flour and stir until there are no more lumps. Continuing to stir, add flour 1 cup at a time (you may not need all 7 cups). The dough is ready when it is still tacky, or wet to the touch, but pulls away from the sides of the bowl into a ball as you stir.
 Let the dough rest for 5 minutes, then stir it for another 2 minutes. Brush it with melted butter, cover bowl with a clean cloth, and put it in the warm oven until it doubles in bulk, about an hour. Remove from oven and beat air into the dough again for at least a minute (if you get tired, you’re doing it right). Cover and let it sit on the counter and rise for another 30 minutes.
Turn dough out onto a floured surface and gently roll out half an inch thick (about the size of a half-sheet baking pan). Cut into 2-inch rounds and place on half-sheet baking pans that have been greased with lard. Brush the tops and sides of the kolaches with melted butter and let rise in the pans until doubled in size, 10 to 15 minutes.
To assemble and bake: Preheat oven to 350 degrees. When kolaches have finished rising, use your fingers to gently make an indentation in the middle of each one and fill it with a tablespoon of Spiced Prune Filling. Sprinkle with Posypka Topping and let rise (yes, again!) for 20 minutes. Bake for 15 minutes, then turn pans 180 degrees and switch sides. Continue baking until bottoms of kolaches are golden, about 15 minutes. Remove from oven, give a final brush with melted butter, and eat as soon as humanly possible. Makes a generous 3 dozen.
FOR THE TEXAVORE A good Texas flour for those Texas kolaches? Lydia Faust favors San Antonio-based Pioneer and its subsidiaries, like White Wings (available in grocery stores).
Posypka Topping
1/4 cup unsalted butter
1/2 teaspoon kosher salt
1/3 cup sugar
1/3 cup flour
Using a pastry blender, cut ingredients together until you have pea-size pieces. Keep cold until ready to sprinkle on kolaches.
Spiced Prune Filling
2 bags Earl Grey tea (individual size)
2 cups pitted prunes
1 cup sugar
1/4 cup butter
1/8 teaspoon ground cloves
1/4 teaspoon ground allspice
1/2 teaspoon ground cinnamon
1/2 teaspoon kosher salt
1 teaspoon vanilla extract
1/4 cup brown liquor (brandy, rum, whiskey), optional
Boil 2 cups water and steep tea bags for 5 minutes. Dice prunes, place in a medium saucepan, and pour tea over them. Simmer for10 minutes, add sugar, and continue simmering for another 5 minutes. Turn heat to low, add butter, spices, and salt, and cook an additional 10 minutes. Remove from heat and add vanilla and liquor. Cool to room temperature and use to top kolaches. Mixture freezes well.
HOW DO I GET MY DOUGH TO RISE?
There’s nothing more, er, deflating than realizing that the yeast in your mass of dough didn’t activate properly, leaving you with a flat, gooey mess. here are some useful tips.
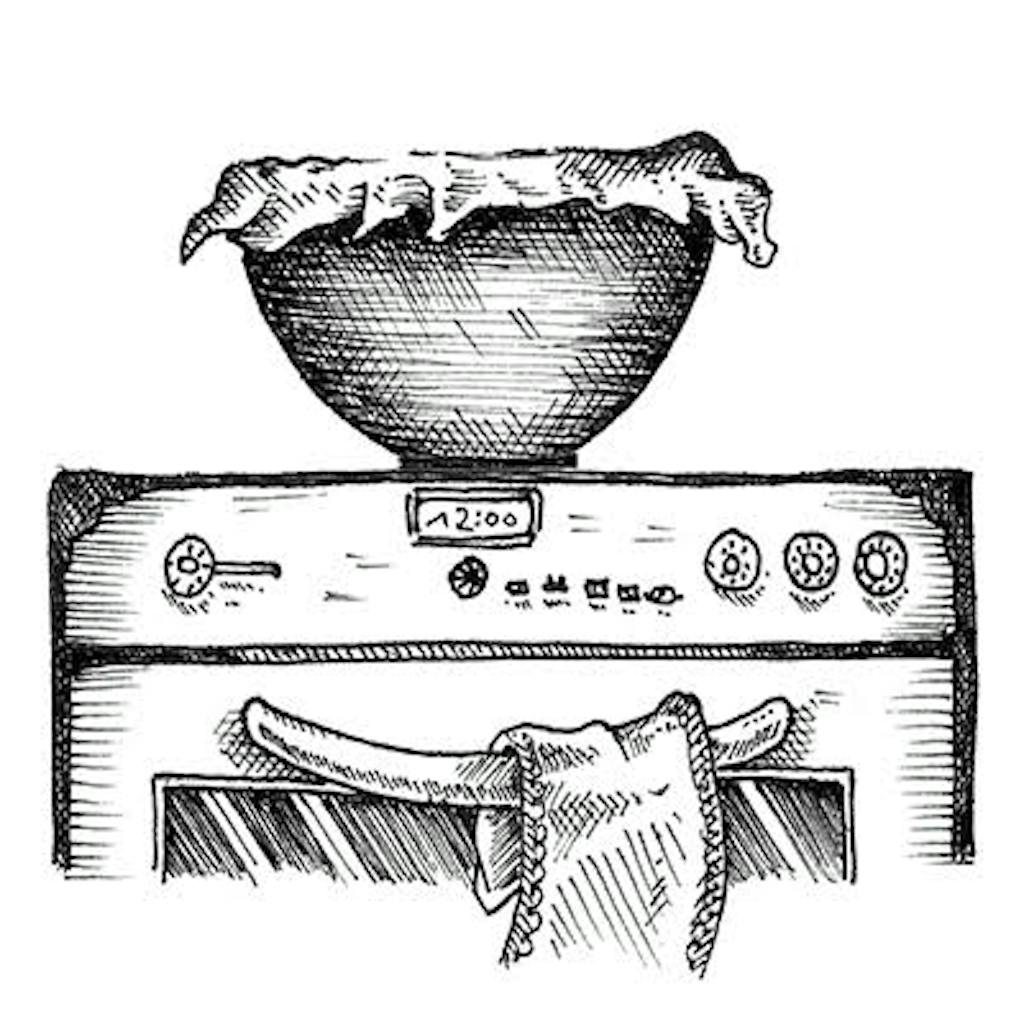 Tip 1: Place the bowl of dough, covered, on top of or near a warm oven. The heat should help activate the yeast, which needs a temperature of about 78 degrees to do its thing.
Tip 2: If that doesn’t work, you can heat the oven, then turn it off and place the bowl of recalcitrant dough inside (using an oven-safe container, of course).
Tip 3: Still having trouble? Check your bowl size. If the container for the dough is too small, the dough can’t expand to its full yeasty potential.
- More About:
- Hugo Ortega


